Board Tags
To manage and customize tags for your tasks on the board, follow these steps:
-
Access Board Tags Settings:
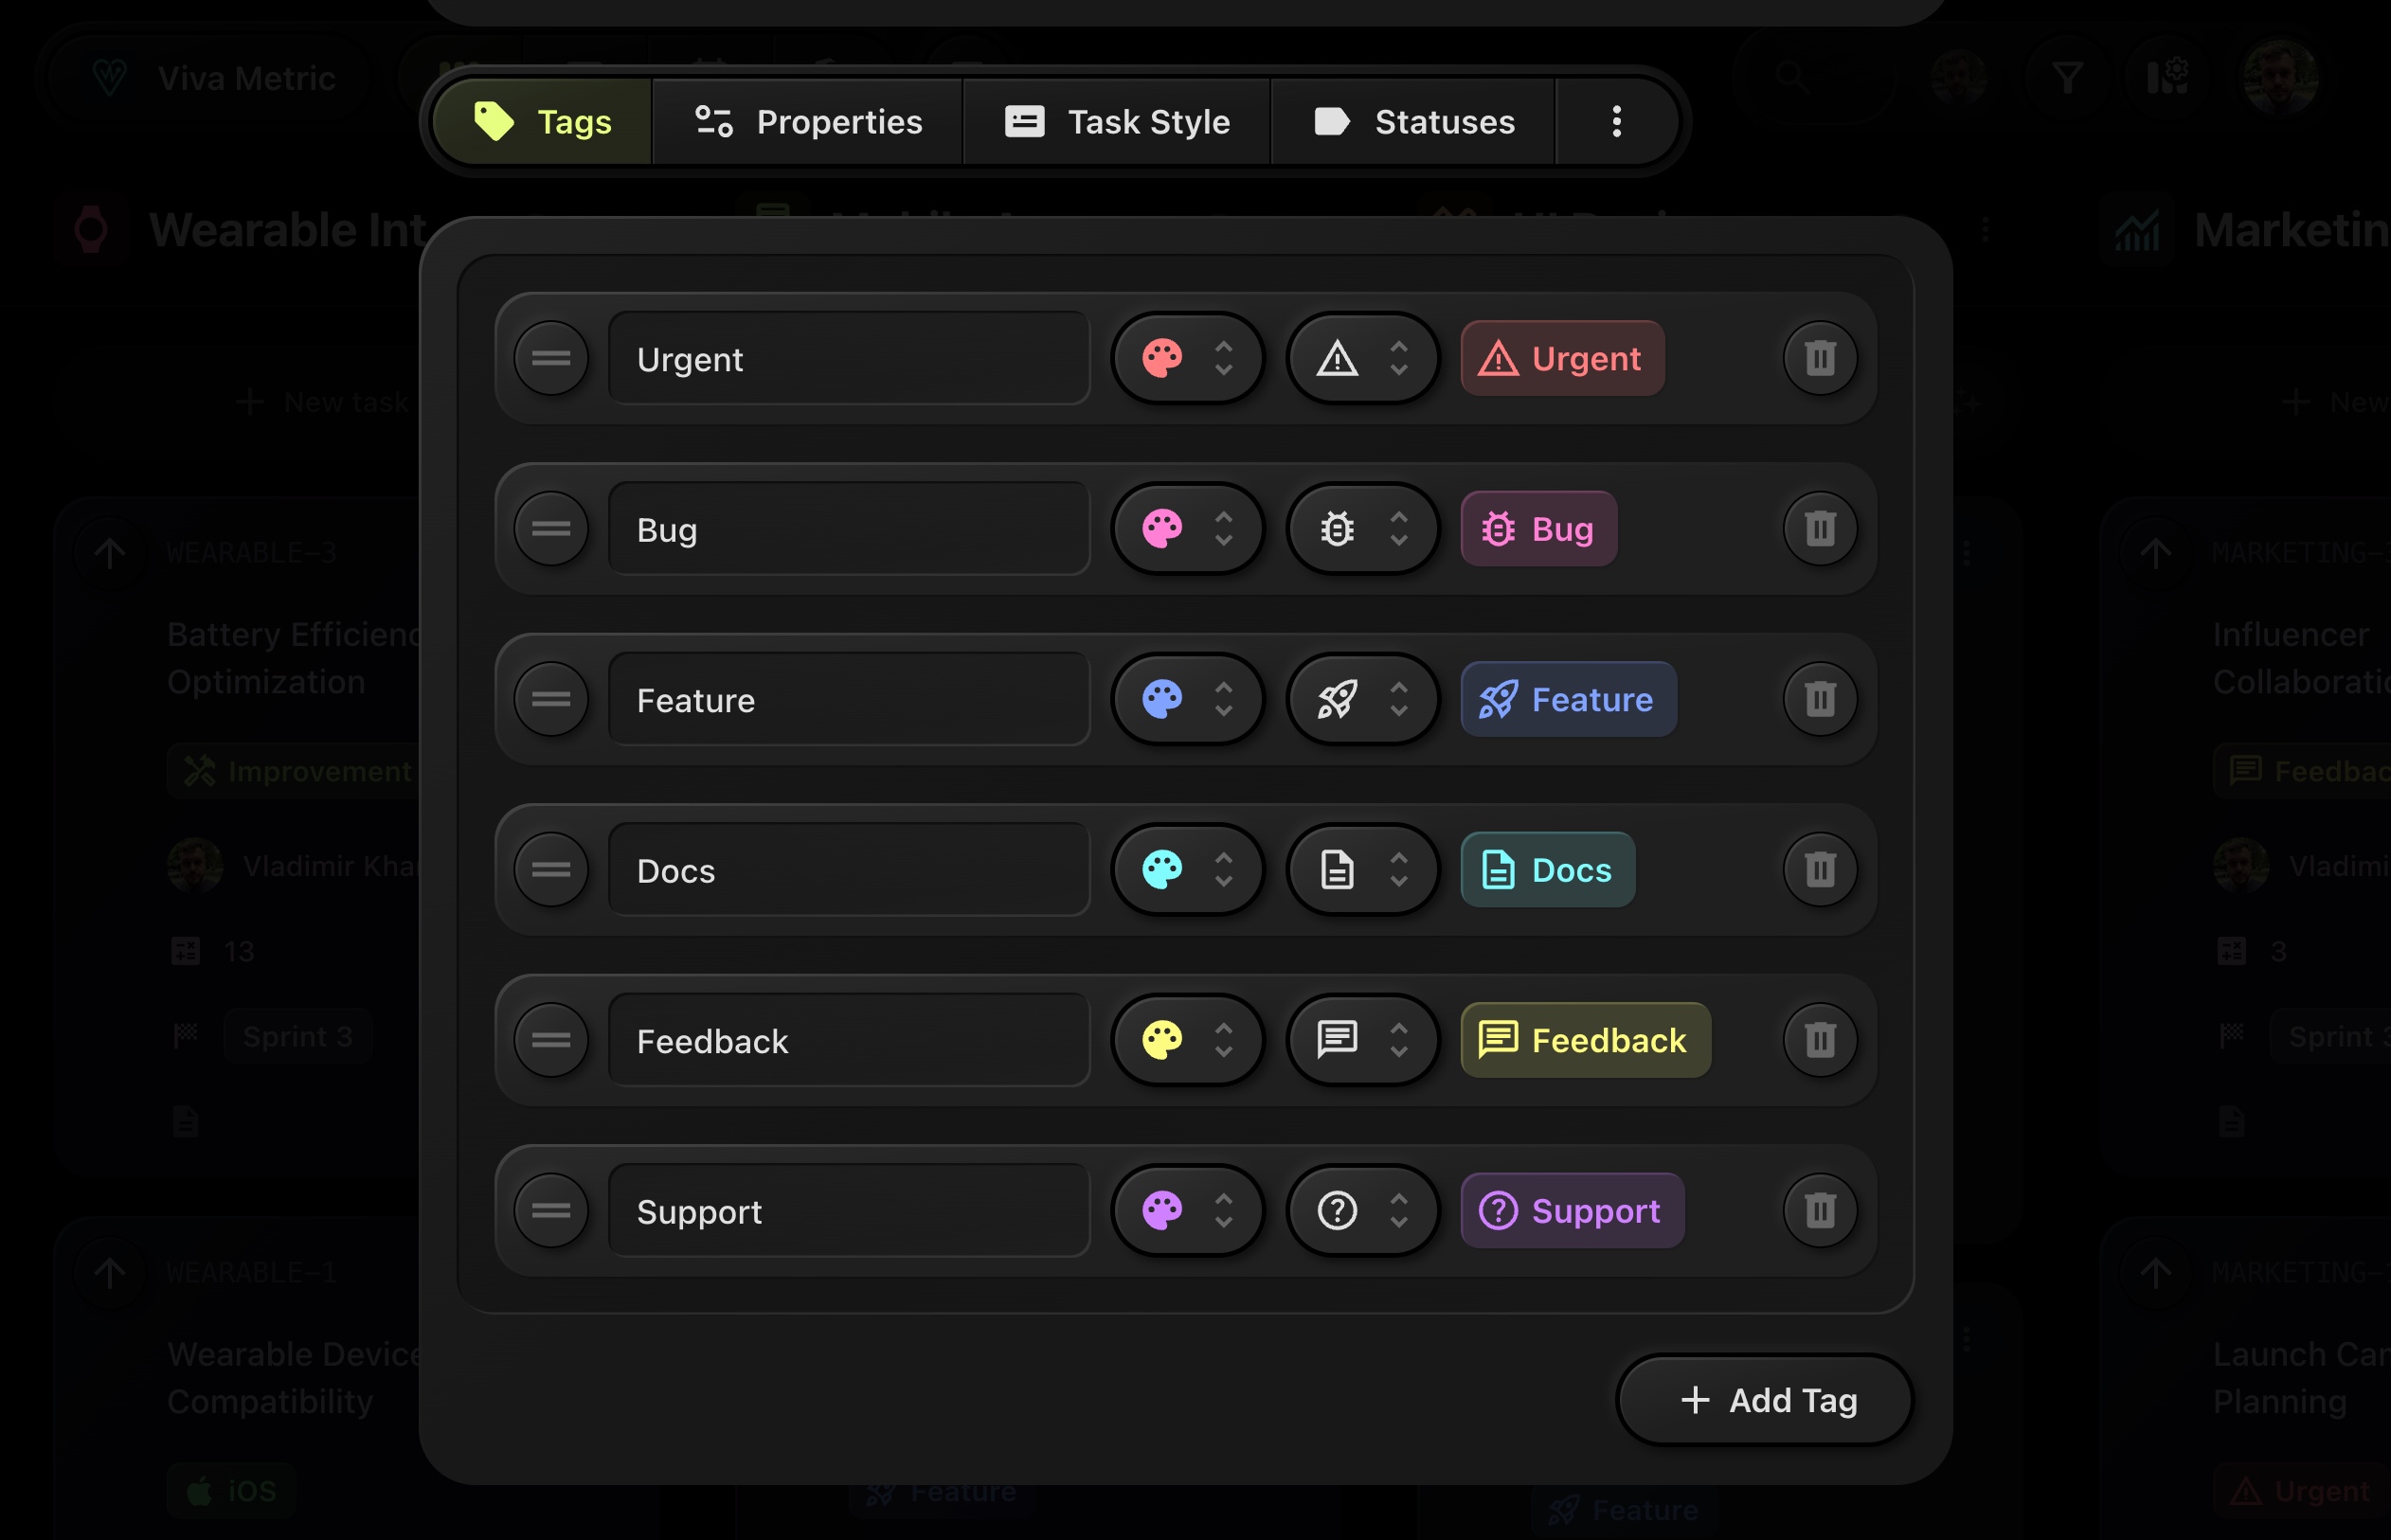
Open the board settings and navigate to the "Tags" tab. This section allows you to view, add, and customize tags used across tasks in the project.
-
Available Tags:
- The existing tags are listed with various properties including tag name, color, and icon.
- You can see in the example that tags such as "Urgent," "Bug," "Feature," "Docs," "Feedback," and "Support" are already defined, each with unique colors and icons to help visually distinguish task types.
-
Editing Tags:
For each tag, you can edit its properties:
- Icon: Set a relevant icon for easy identification of tasks.
- Color: Choose a color palette to highlight the tag visually across tasks.
- Name: You can rename any tag to fit the workflow of your board.
- Remove Tags: Use the trash bin icon to delete a tag that is no longer needed.
-
Reorder Tags:
You can reorder tags using the drag handle button on the left (the two lines icon). This helps in organizing the priority of tags when working with many categories.
-
Add New Tags:
Click the “+ Add Tag” button at the bottom of the list to create new tags. You can define the name, icon, and color for each new tag to suit your specific project needs.
These tags make task management more efficient by categorizing and prioritizing tasks based on their type, urgency, or other criteria.