- Dashboard
- Workspace
- Projects
- Board Settings
- Project Settings
- Tasks
- Create Task
- Edit Task
- Change Status
- Order Tasks
- Subtasks
- Task Dependencies
- Milestones
- Pin To Top
- Task Templates
- Duplicate Task
- Move To Board
- Create Note From Task
- Archive Task
- Unarchive Task
- Delete Task
- Task Updates History
- Reminders
- Time Tracking
- AI Tasks
- Export Task
- Share Task
- Import Multiple Tasks
- Export Multiple Tasks
- Notes
- Forms
- Comments
- Text Editor
- Account
- MCP Server
- t0ggles Crew
Subtasks
Subtasks allow breaking down larger tasks into smaller, manageable pieces. You can create new subtasks or link existing tasks as subtasks.
#Create a Subtask
To create a new subtask:
- Open the task by clicking on its card to view task details.
- Click the task menu button (⋮) at the top-right.
- Select "Add Subtask".
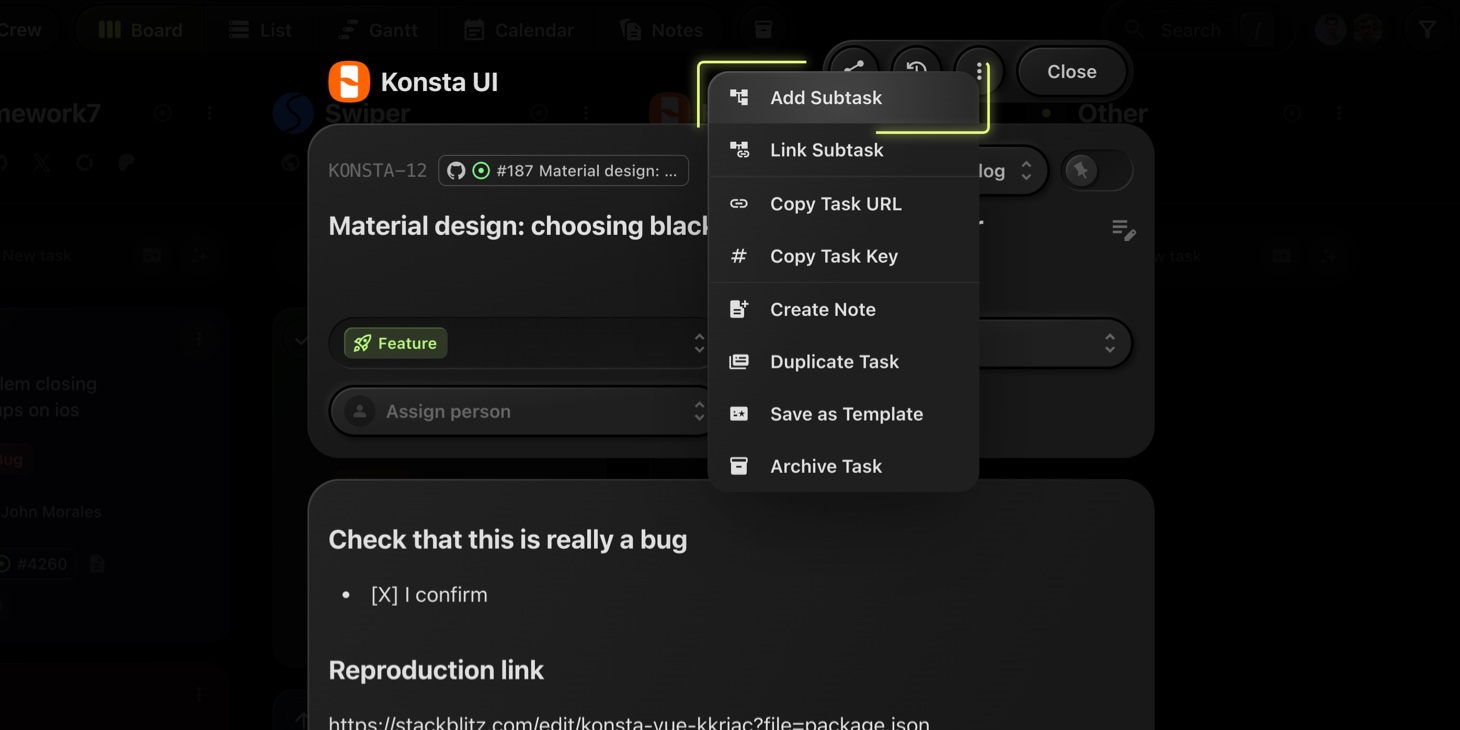
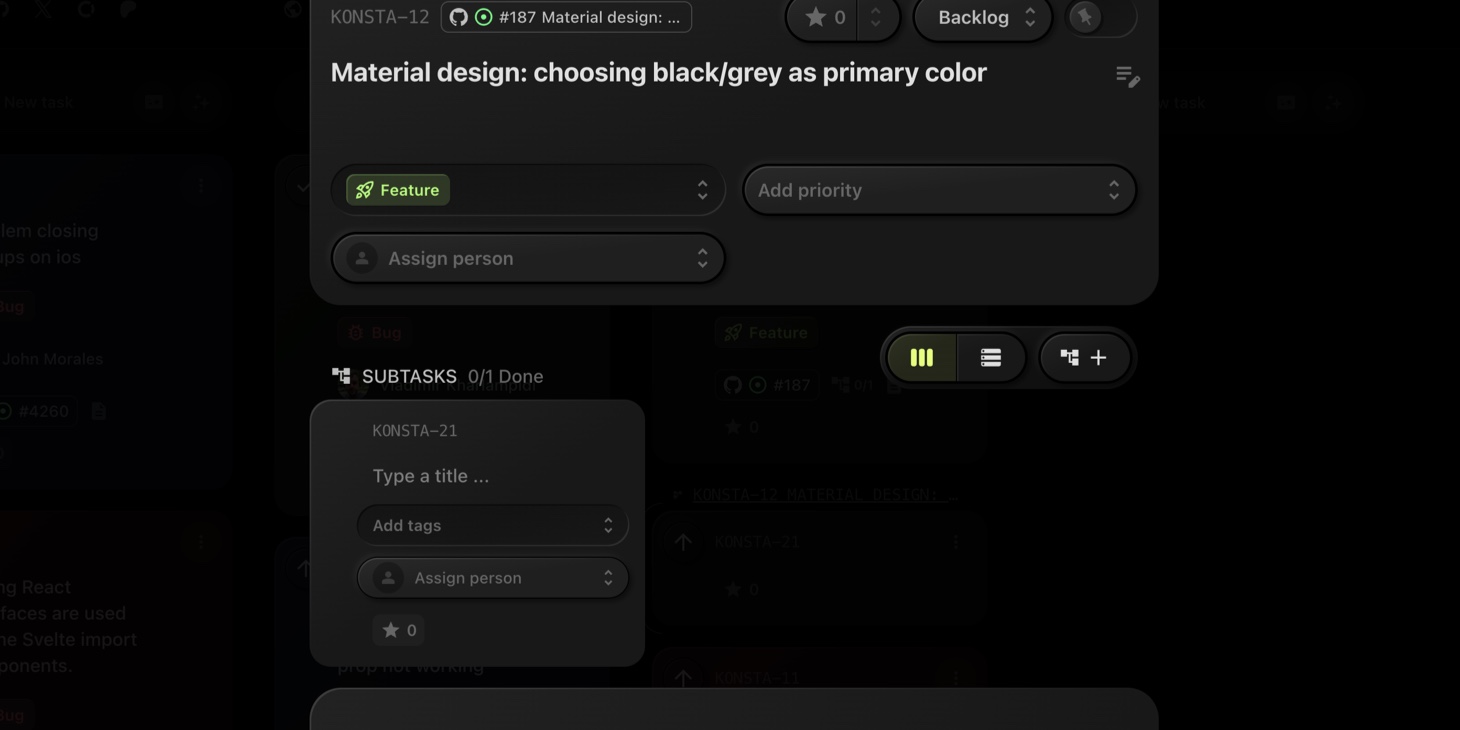
- A new subtask will be added below, prompting you to specify its title and details.
#Create Subtask From Selected Text
When a task description already lists what needs to be done, you can turn any part of it into a subtask:
- Open the task and select text in its description.
- In the formatting menu above the selection, click the subtask button.
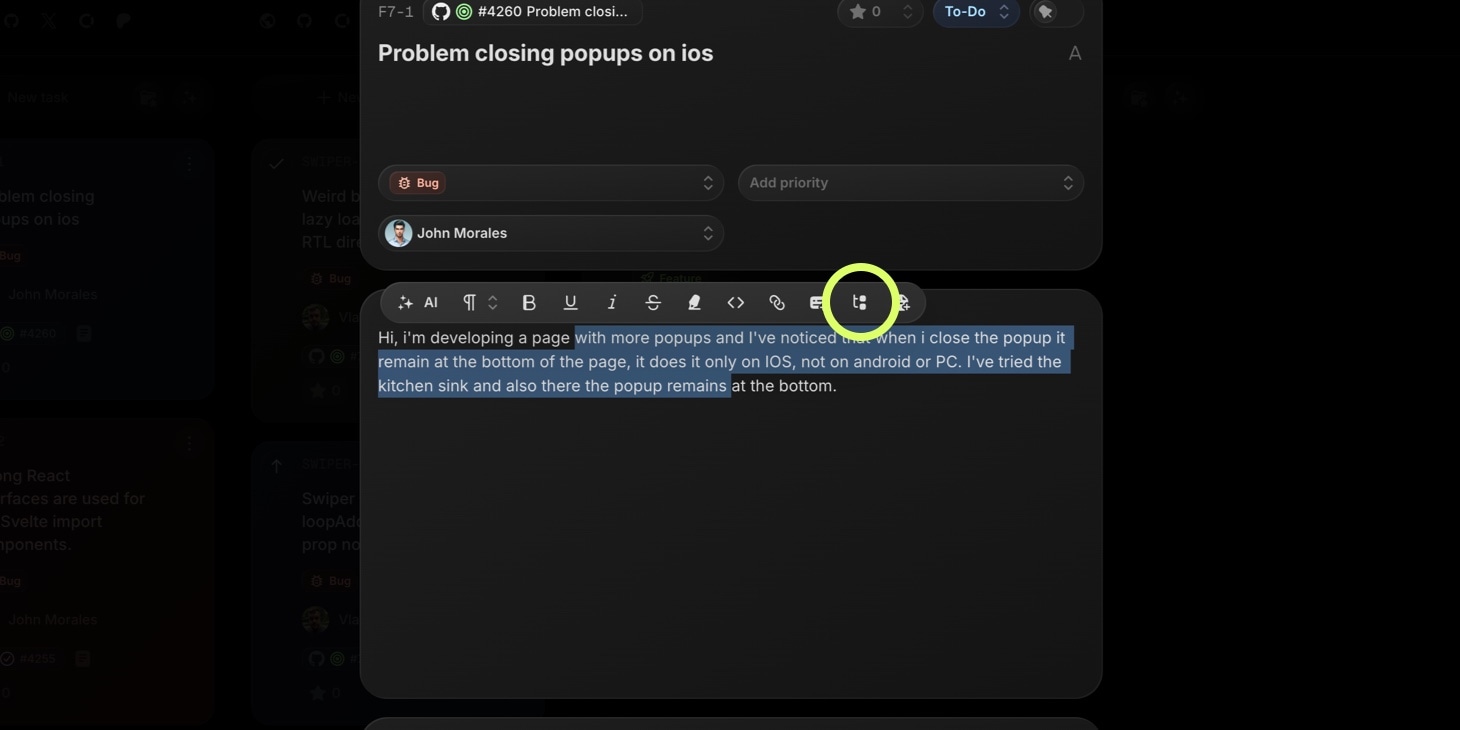
- The subtask is created in the same project and appears in the Subtasks section of the task.
A short single-line selection (for example, a list item) becomes the subtask title. A longer or multi-line selection is saved as the subtask description instead.
You stay on the parent task after creating, so you can keep selecting other lines to break the task down into more subtasks.
#Link Existing Task as Subtask
If a relevant task already exists and should be part of another task as a subtask:
-
Open the parent task to view its details.
-
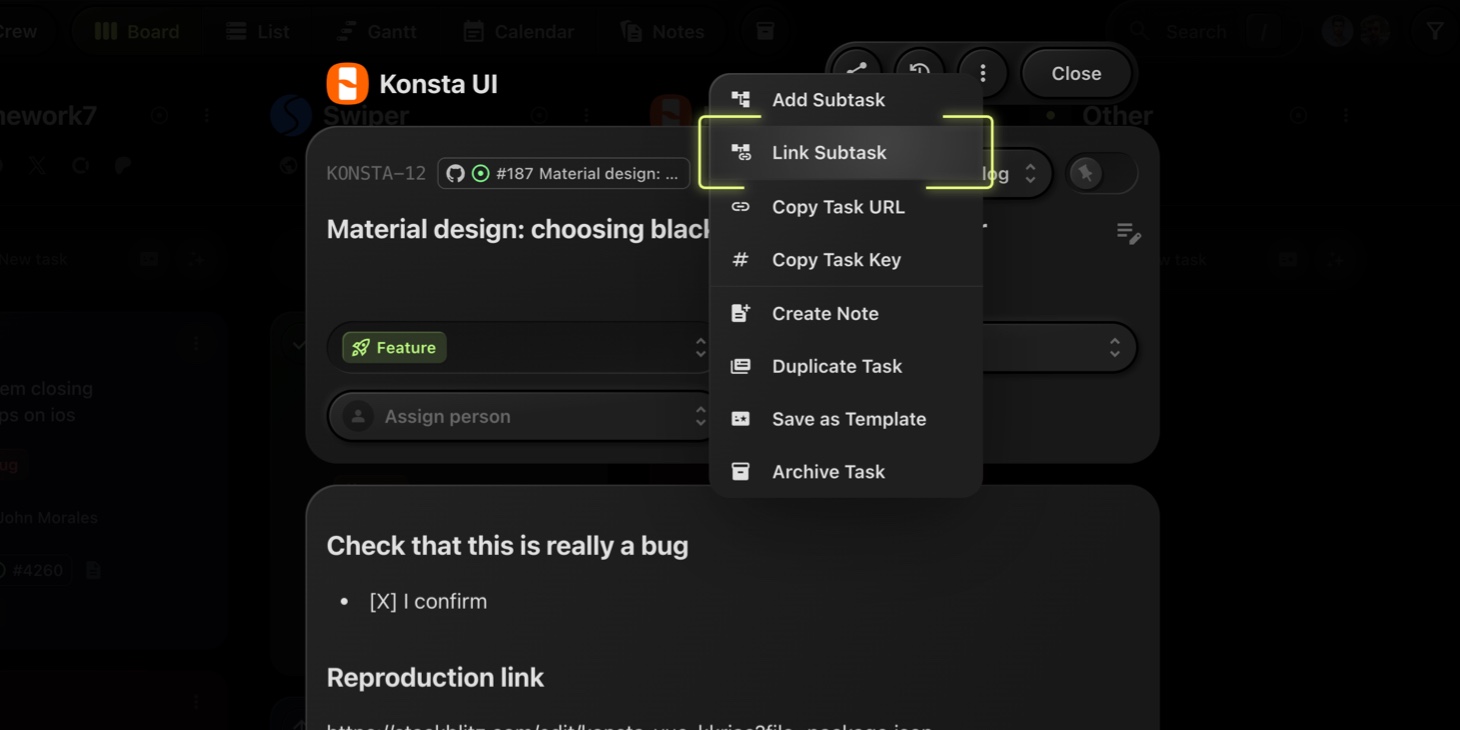
Click the task menu button (⋮).
-
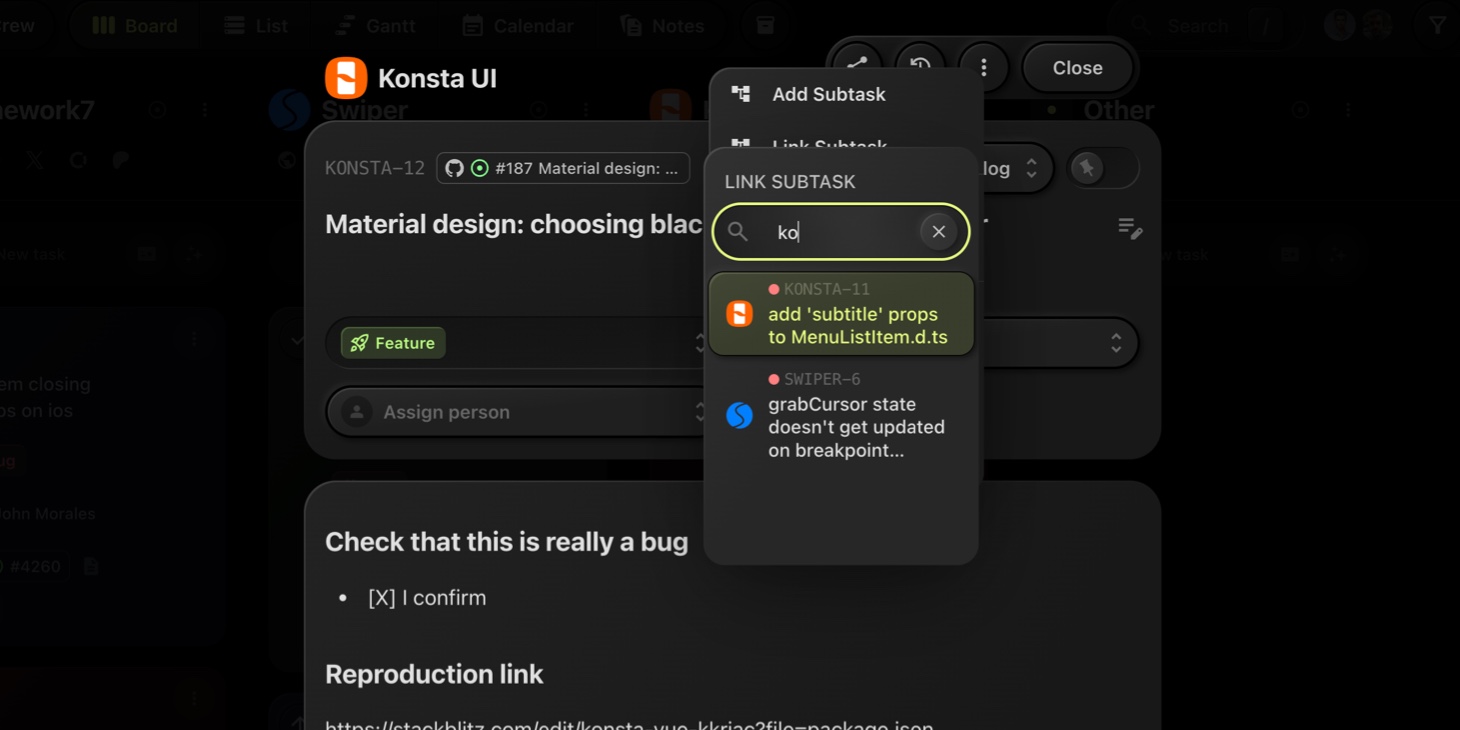
Choose "Link Subtask".
-
Use the search field to find and select the task you wish to link.
-
The selected task is now linked as a subtask.
#Unlink Subtask
To unlink a subtask from its parent:
-
Open the subtask to view its details.
-
Click the task menu button (⋮).
-
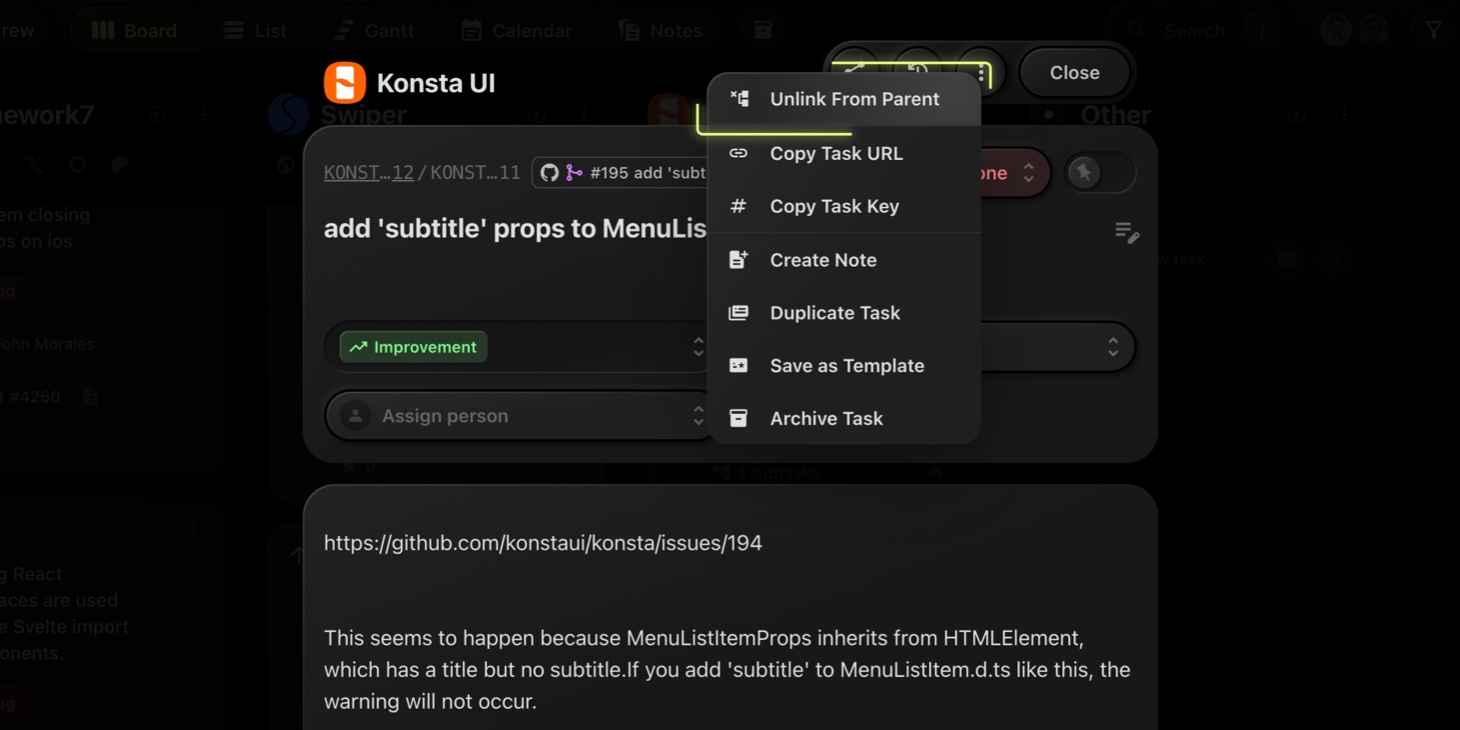
Choose "Unlink From Parent".
-
The task will be unlinked from its parent and will no longer be a subtask.
#Nest Subtasks Inside Parent Task
By default, subtasks show up as separate cards on the board. To keep them inside their parent task instead:
-
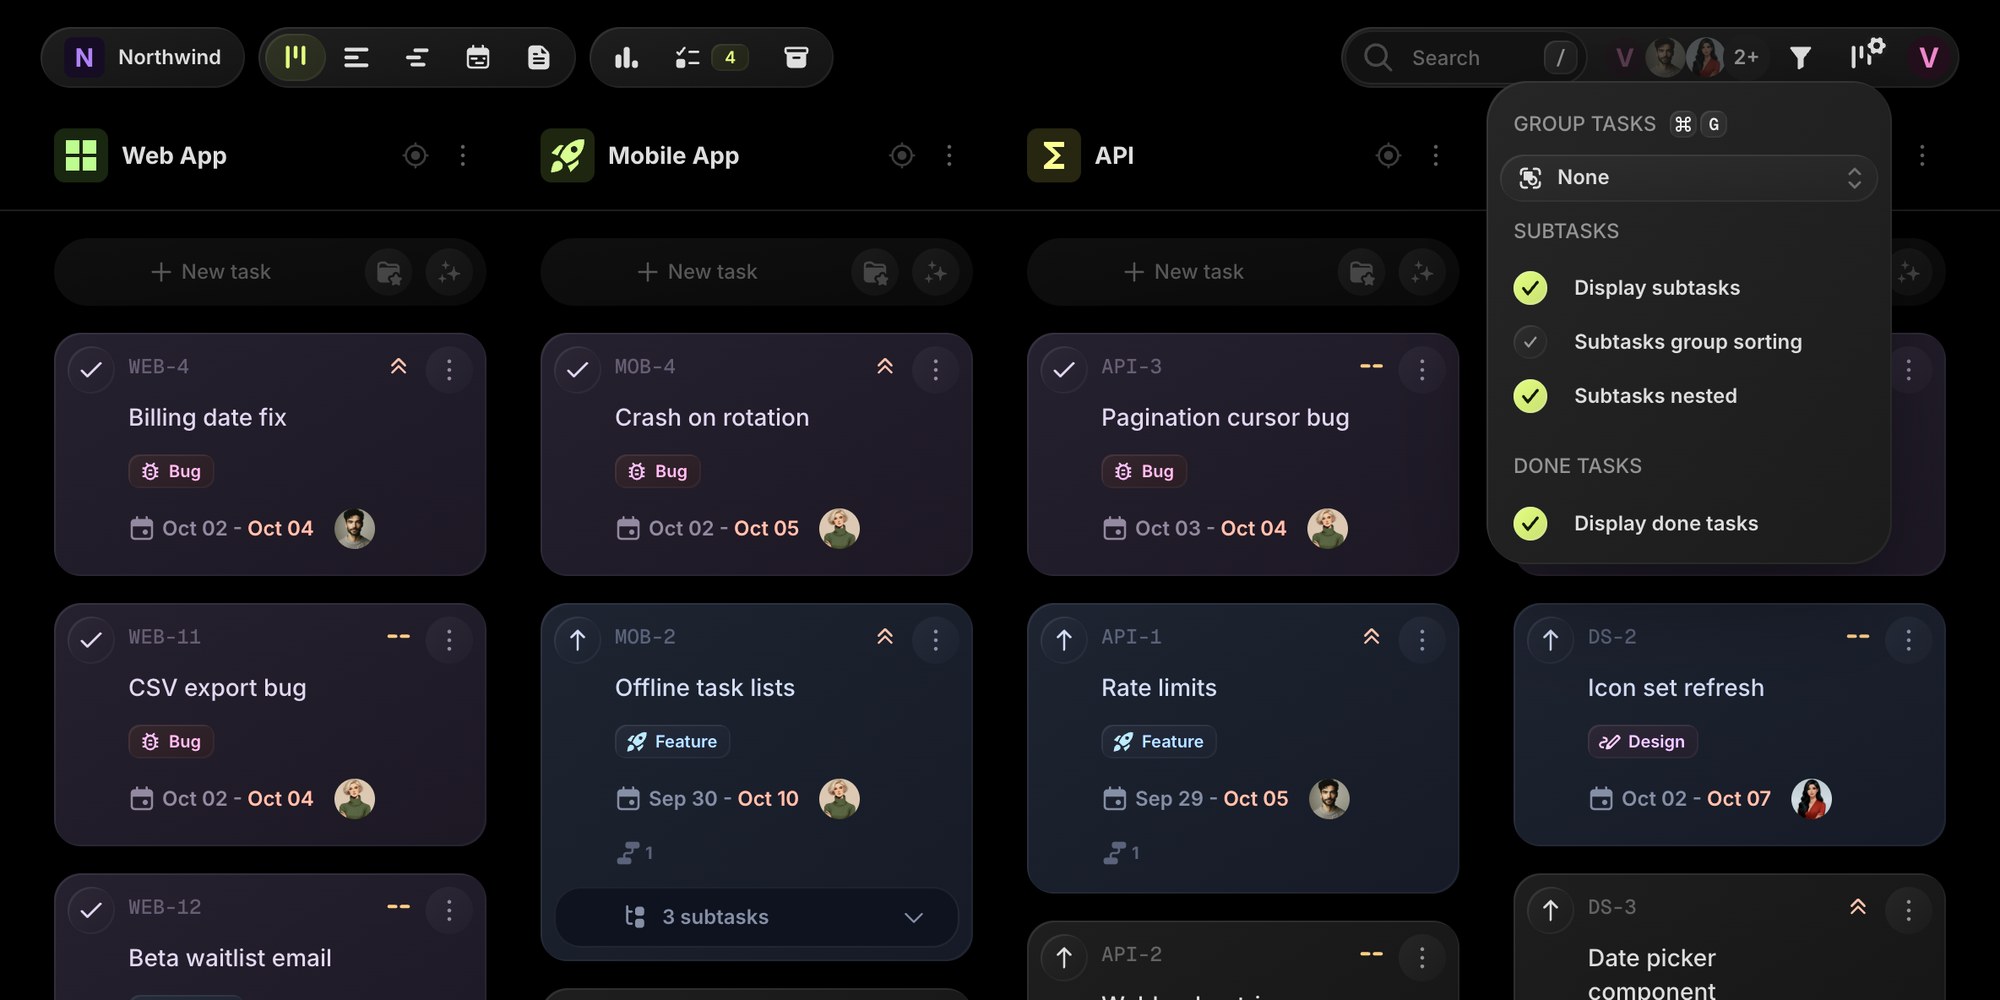
Click the Board View Settings button in the top bar.
-
Under Subtasks, enable Subtasks nested.
-
Parent tasks now show a subtasks bar with the number of subtasks. Click it to expand or collapse the subtasks right inside the parent card.
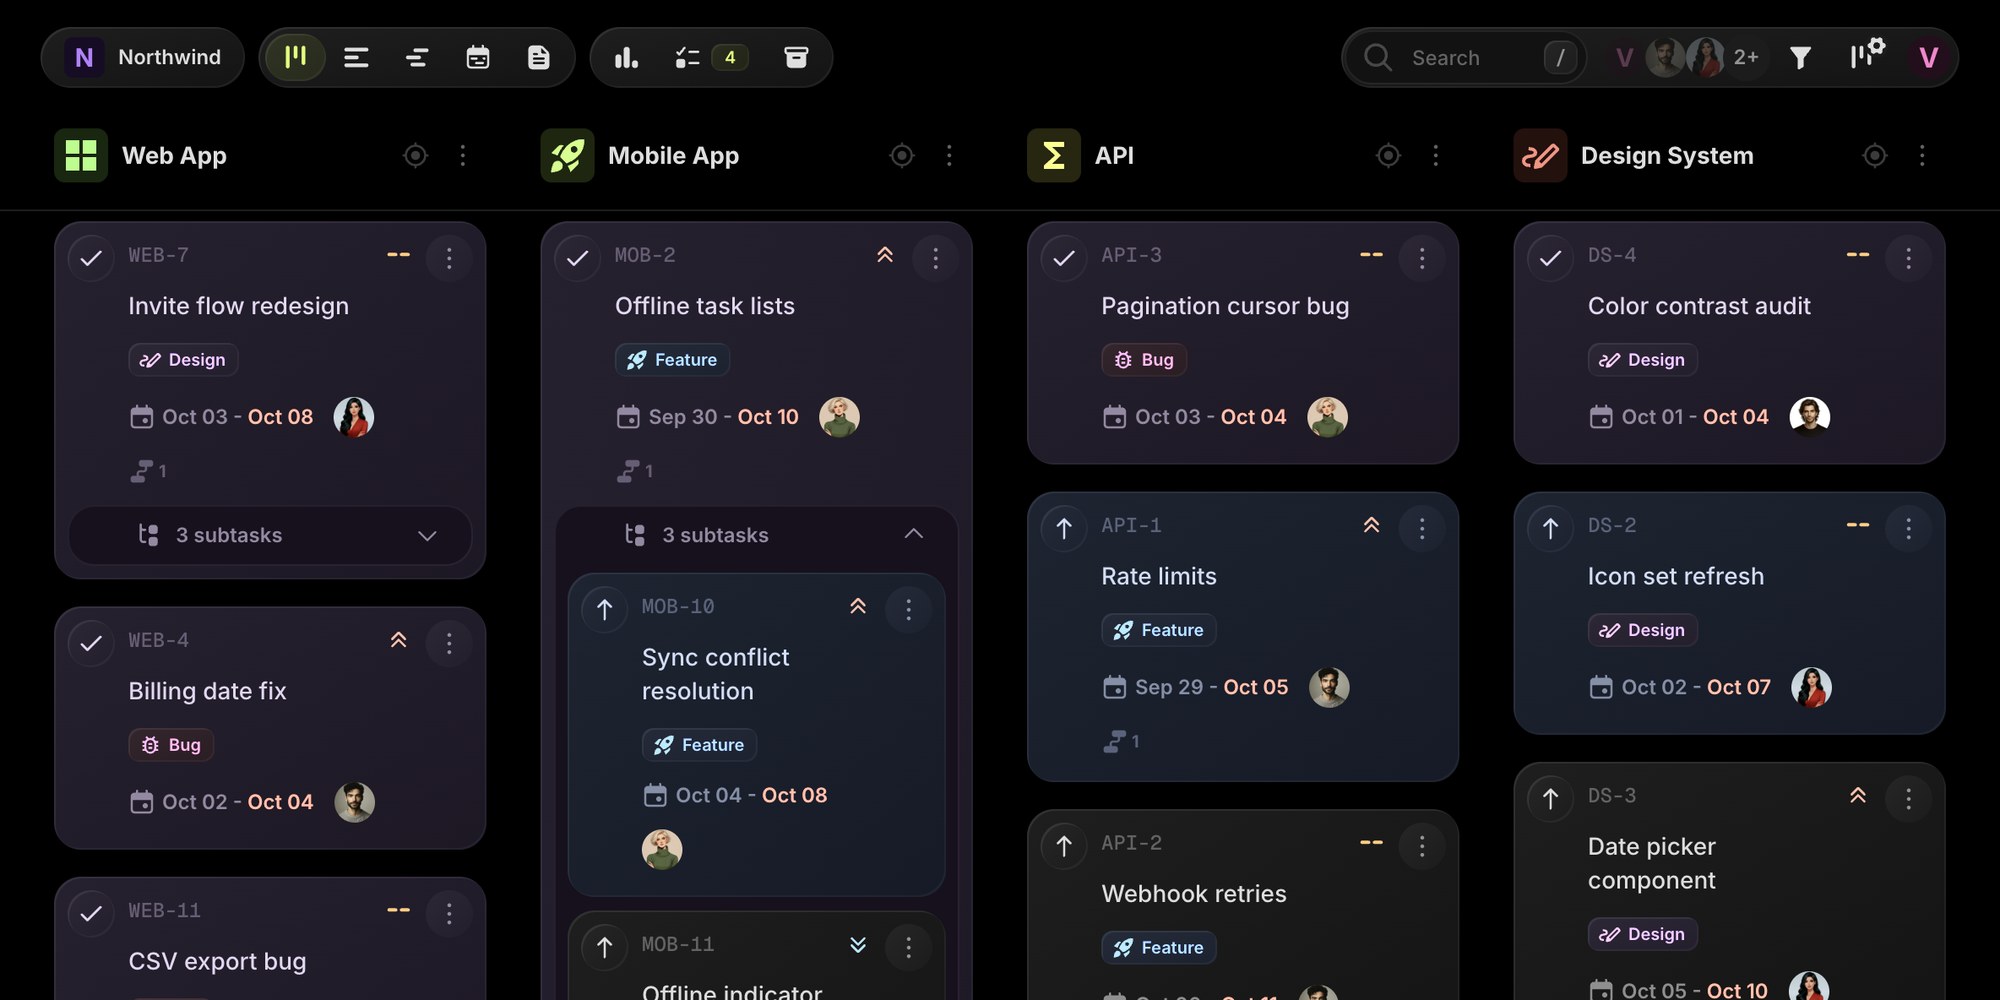
Each parent task remembers whether it is expanded or collapsed. Nested subtasks work in Board, List, and Gantt views, and you can still open, edit, and drag them like any other task.
To show subtasks as separate cards again, disable Subtasks nested. To hide subtasks from the board entirely, disable Display subtasks.