Board Automation
Board Automations let you create simple rules that update tasks or create new ones automatically. They are configured per board and are useful for things like auto-assigning bugs, setting due dates when status changes, or creating recurring tasks.
You can create as many automations as you need for each board.
- Access Board Automation Settings
- Automation Types
- Create A New Automation
- Task-Based Automations (Task Created / Updated)
- Due Date Automations
- Schedule Automations (Recurring Tasks)
- Enable, Duplicate, And Delete Automations
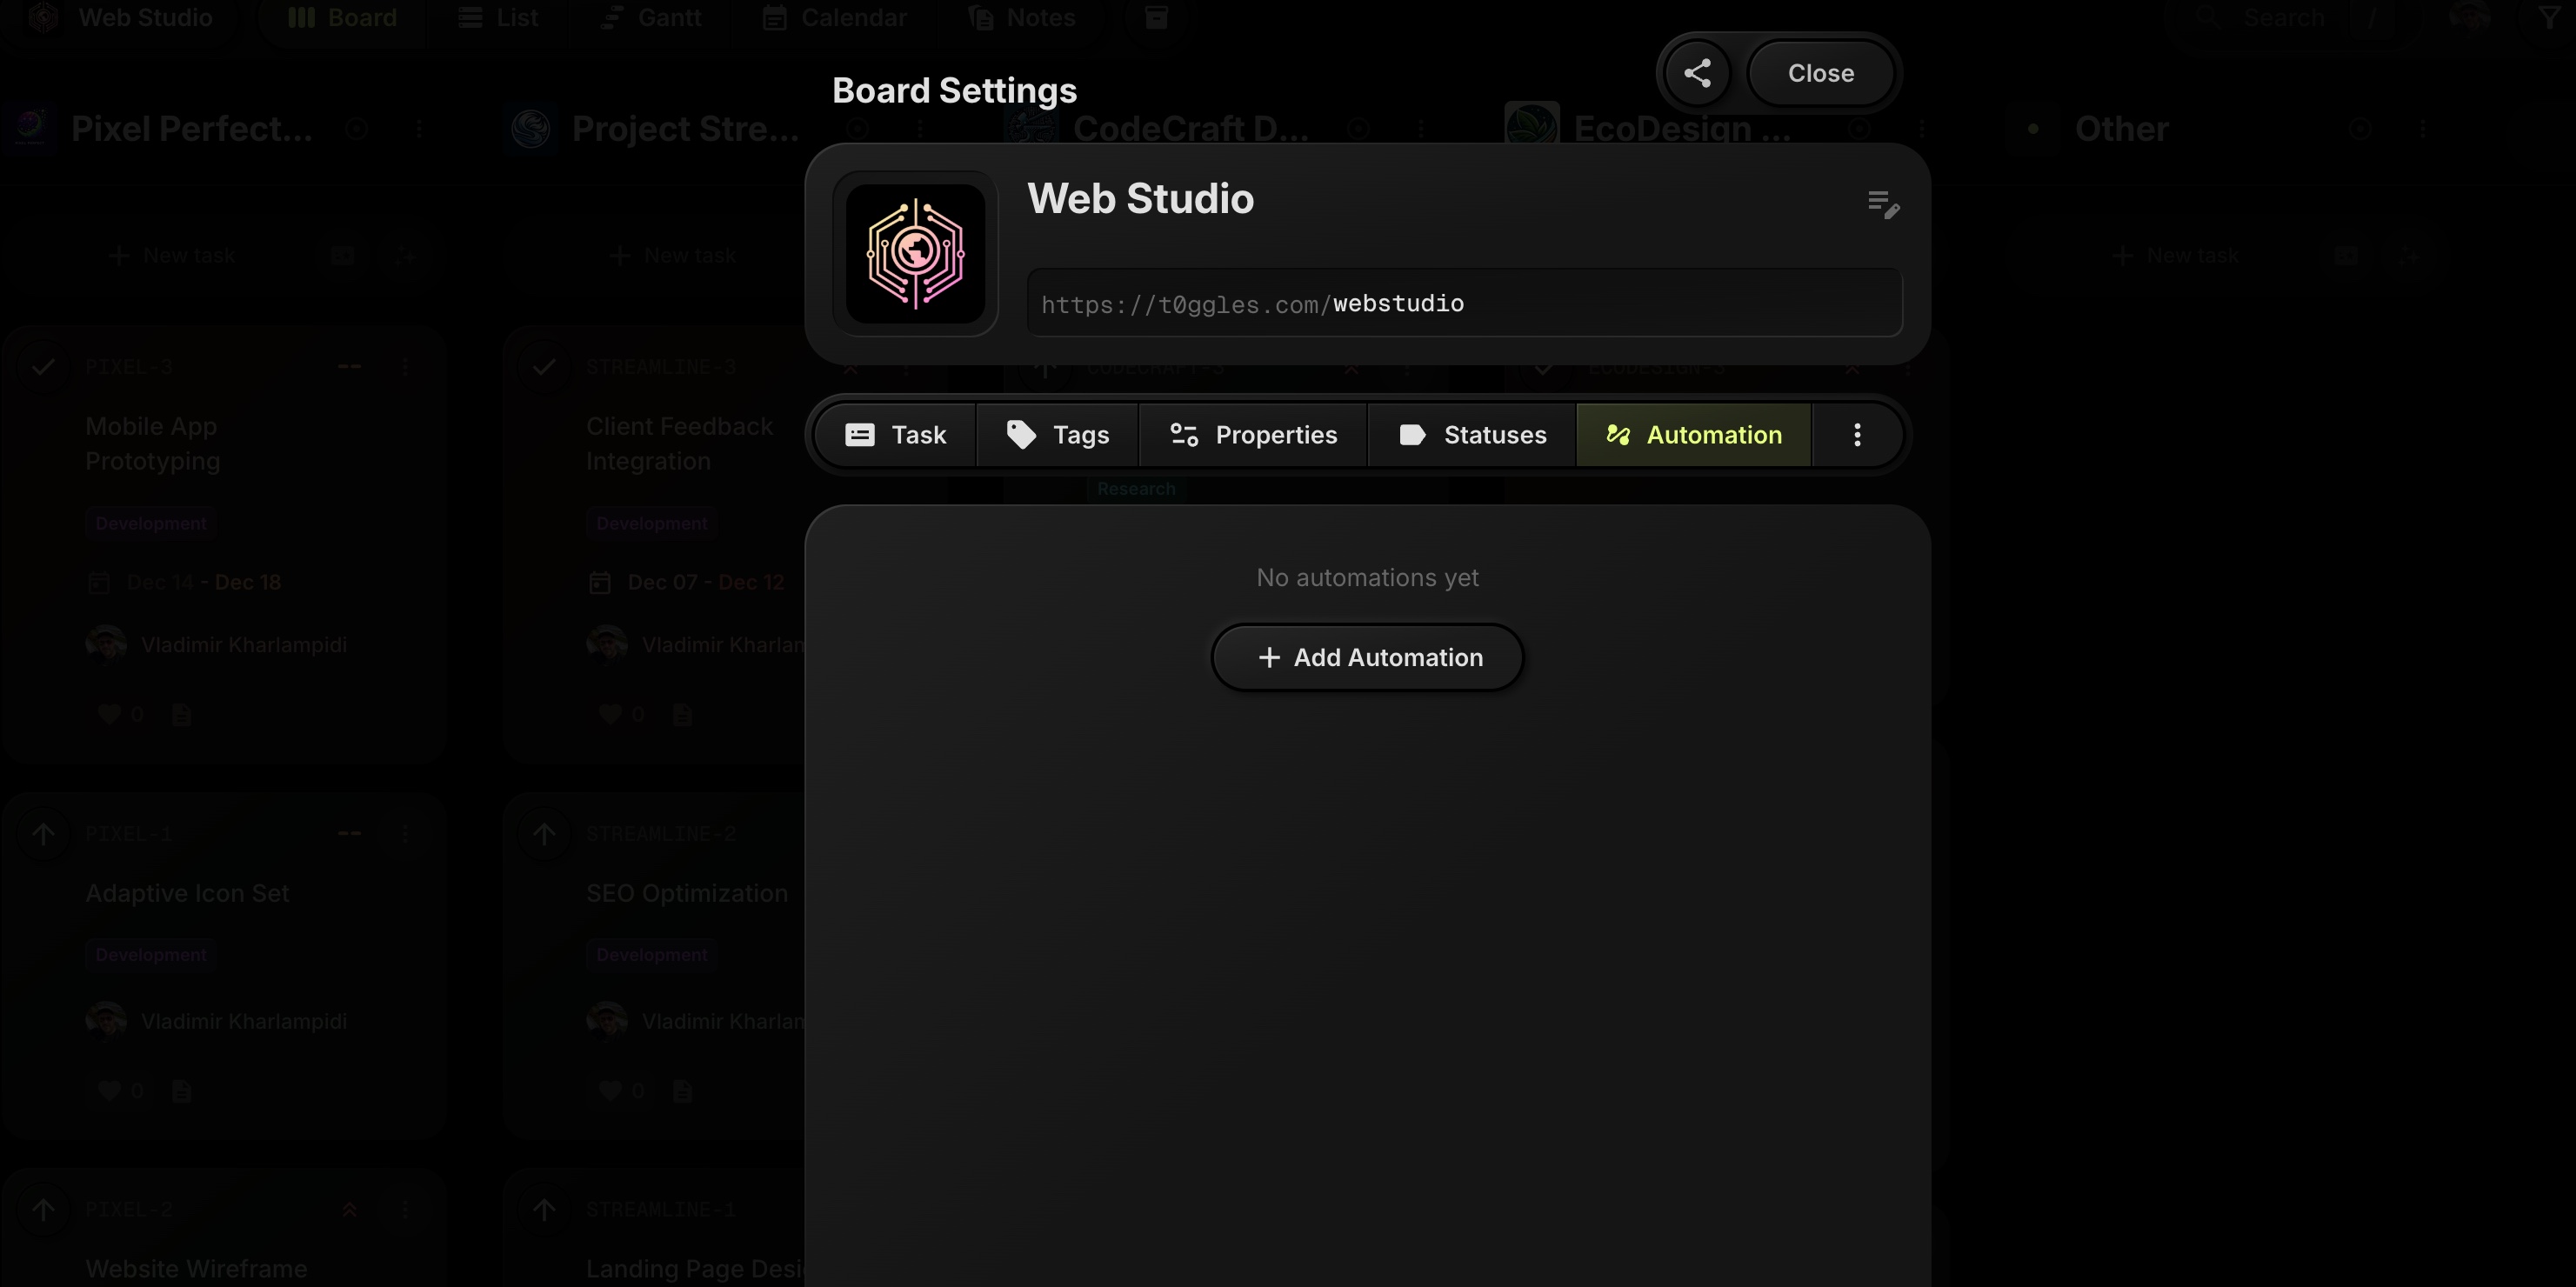
#Access Board Automation Settings
- Open the board where you want to configure automations.
- Click the Board Settings button in the top-right corner.
- Go to the Automation tab.
If there are no automations yet, you will see an empty state with a + Add Automation button.
#Automation Types
Each automation has:
- A Name - used to describe what the rule does (e.g. "Bug", "Assign Reviewer", "Monthly Client Report").
- A Trigger - when the automation should run.
- A Scope - which board or project the rule applies to.
- Optional Conditions - filters to limit which tasks are affected.
- One or more Actions - what should happen when the rule is triggered.
There are three trigger types:
-
Task Created / Updated Runs when a task is created or when its properties change (status, tags, assigned user, etc).
-
Due Date Runs based on task due dates - either before a task is due (for reminders) or after it becomes past due (for escalation).
-
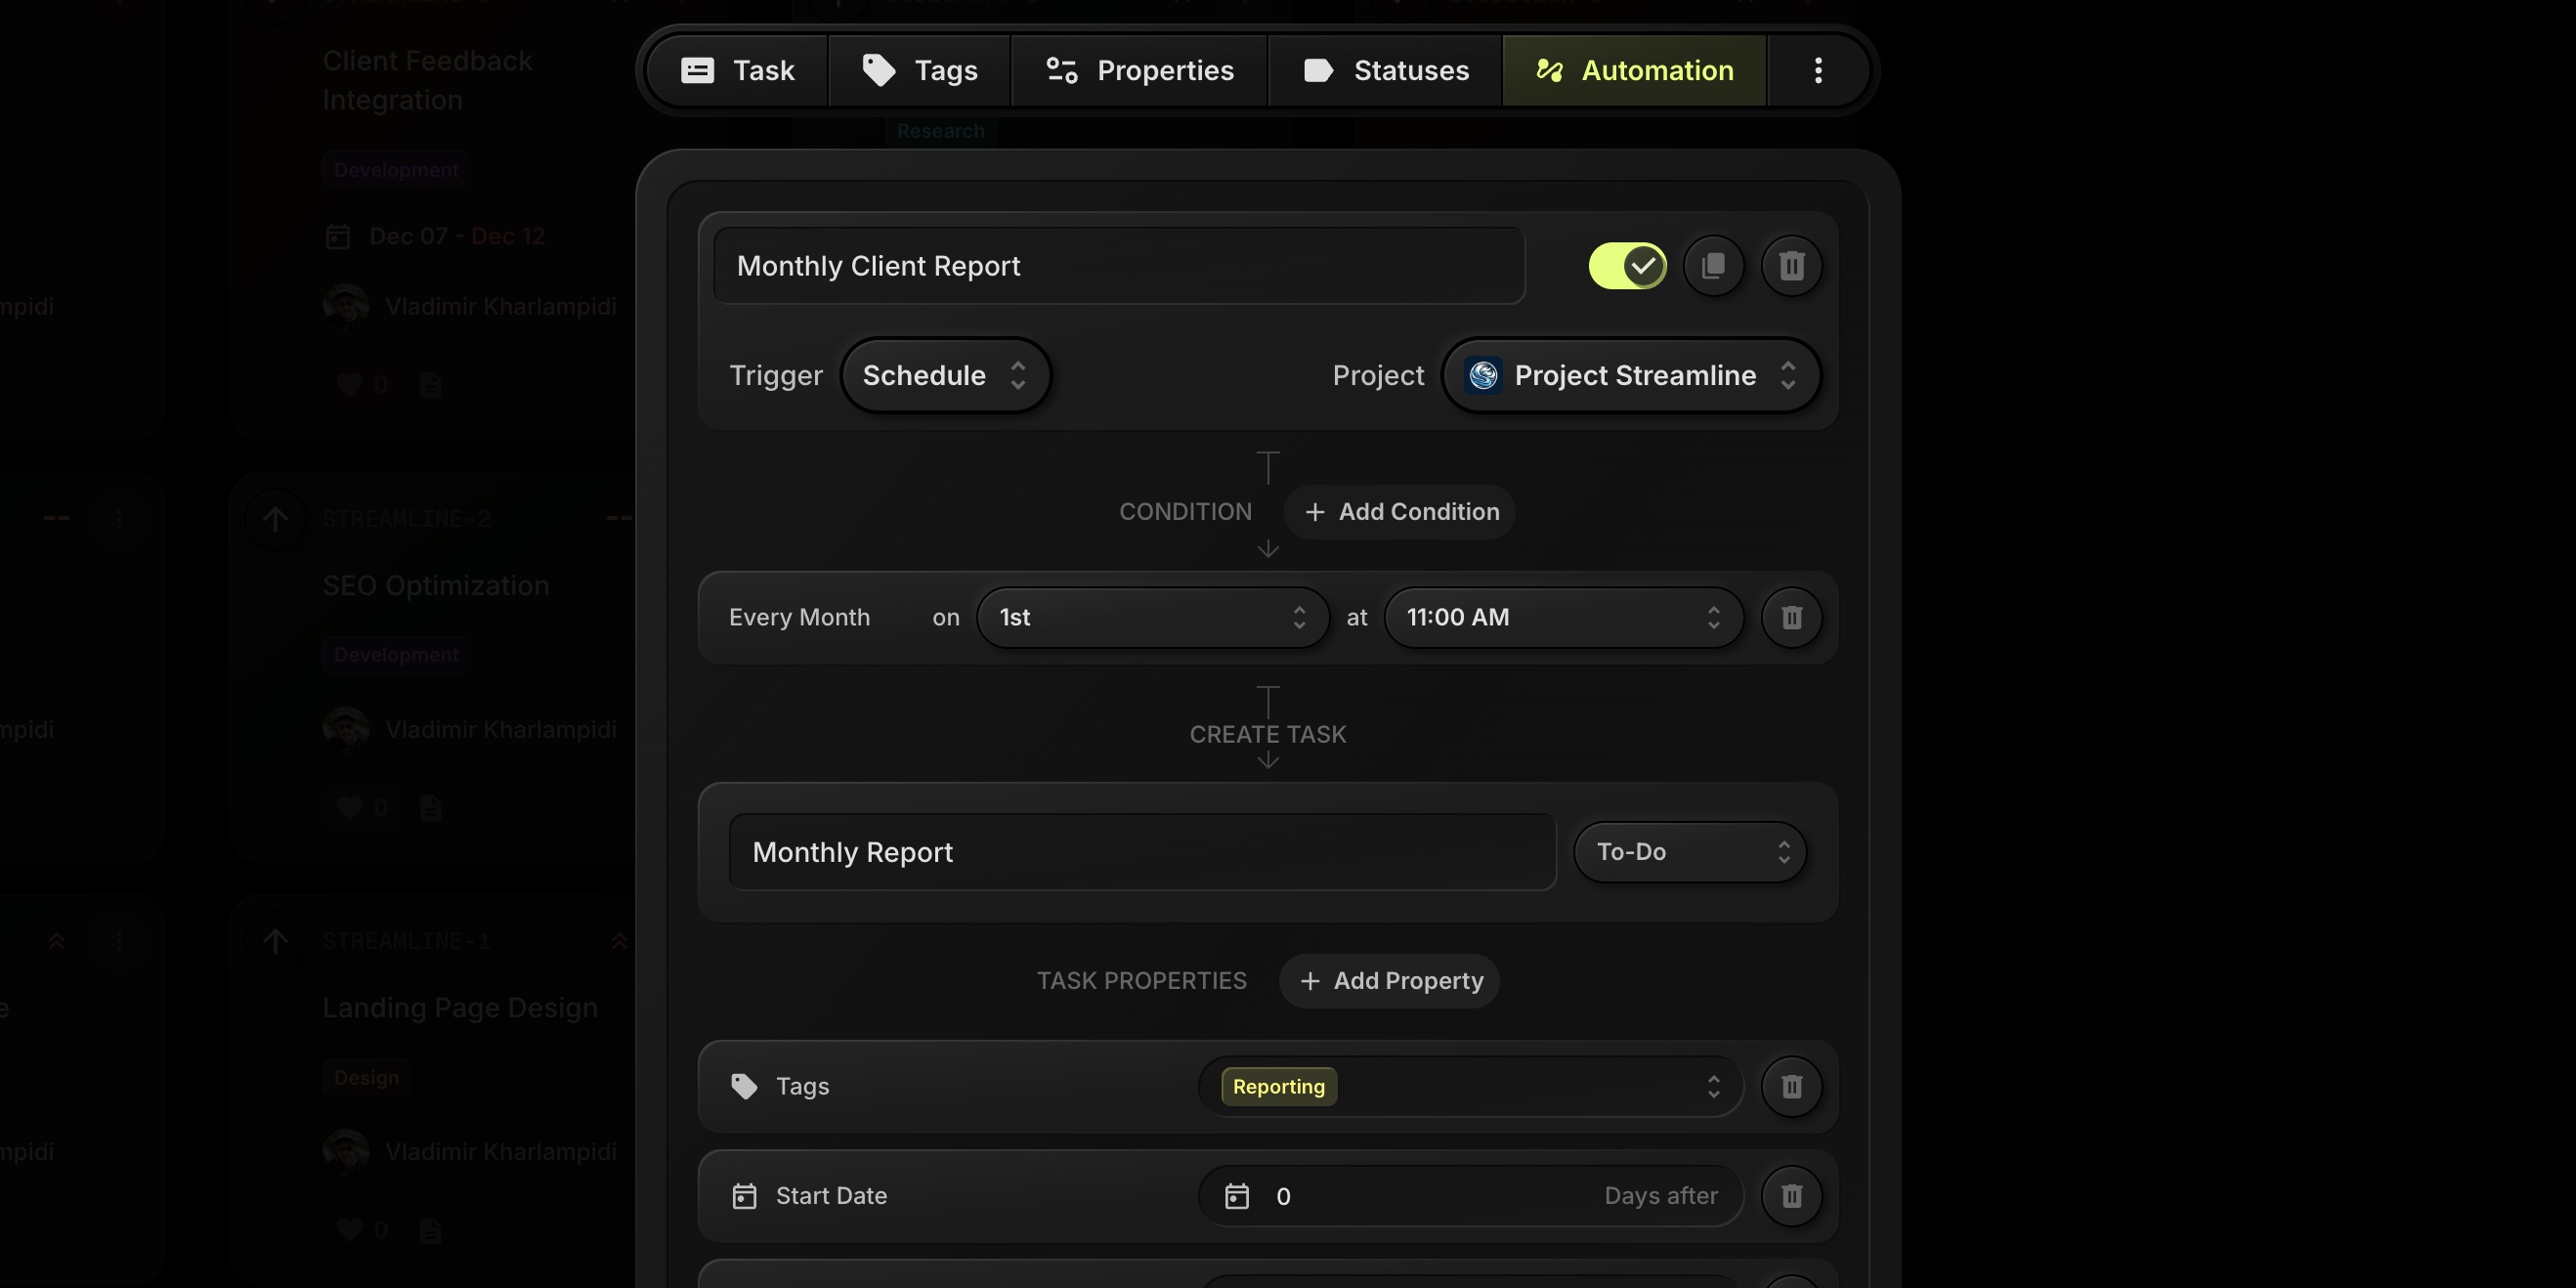
Schedule Runs on a defined schedule (for example, every month on the 1st at 11:00 AM) and is typically used to create recurring tasks.
#Create A New Automation
-
Go to Board Settings → Automation.
-
Click + Add Automation.
-
Enter a Name for the automation (for example, "Bug" or "Assign Reviewer").
-
Use the switch in the top-right corner of the card to enable or disable the automation.
-
Choose the Trigger:
- Task Created / Updated,
- Due Date, or
- Schedule.
-
Set the Scope:
- Board - rule applies to all projects on the board.
- Or pick a specific Project to apply the rule only there.
-
Configure Conditions (optional).
-
Configure Actions - either updating an existing task or creating a new one (depends on the trigger type).
-
Click outside of the fields or close Board Settings - changes are saved automatically.
#Task-Based Automations (Task Created / Updated)
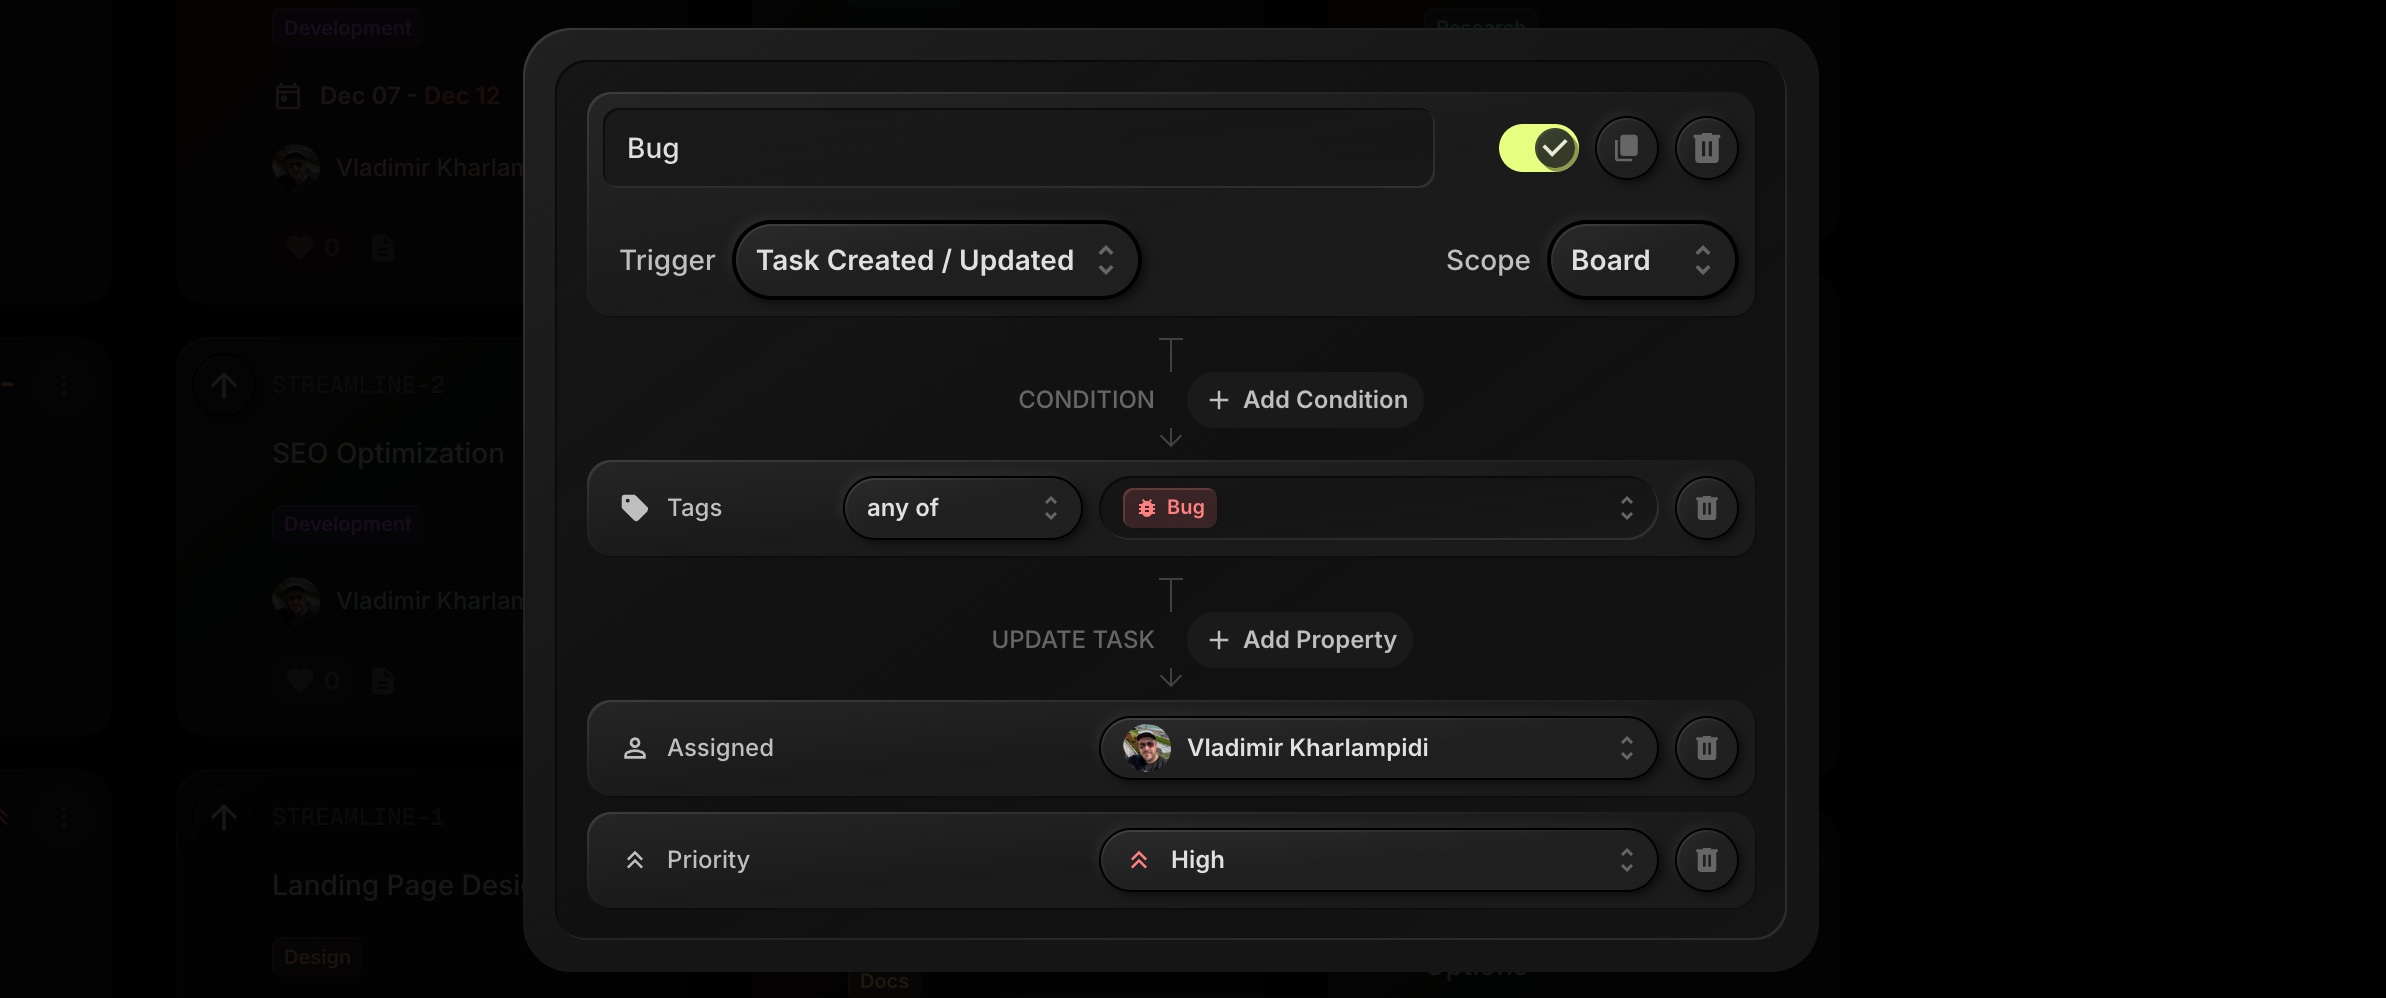
Use the Task Created / Updated trigger to react to changes on tasks, for example:
- Auto-assign tasks with specific tags.
- Set due dates when the status changes.
- Change priority when a task is moved to a review column.
#Configure Task Conditions
Under CONDITION, click + Add Condition to add filters. Each condition row consists of:
-
Field - what you want to check:
- Status
- Tags
- Assigned
- Priority
- Is Subtask
- Created By
- Custom properties (Board Properties)
-
Operator - how the field should be matched (for example, "any of" for lists).
-
Value - specific statuses, tags, users, etc.
Examples:
-
Status - any of - ReviewOnly tasks whose status is "Review" will match. -
Tags - any of - BugTasks that contain the "Bug" tag will match. -
Created By - any of - GitHubTasks created via the GitHub integration will match. Other options include Email, API, Zapier, Automation, and Google Calendar.
You can add multiple conditions. All conditions must match for the automation to run on a task.
#Update Task Properties
Under UPDATE TASK, click + Add Property to define what should change when the rule runs.
Available actions include:
- Assigned - assign the task to a specific user.
- Priority - set the priority level (for example, High).
- Status - move the task to a different status/column.
- Tags - add or adjust tags on the task.
- Start Date - set a start date, often relative to when the rule runs.
- Due Date - set or shift the due date.
- Custom Properties - set or adjust custom properties on the task.
For date fields you can use relative values, such as:
Start Date - 0 - Days after(start today)Due Date - 3 - Days after(due 3 days after the rule runs)
This is useful for automations such as:
- When a task moves to Review, assign a reviewer and set due date to 3 days after.
- When a task is tagged Bug, assign it to a specific developer and set priority to High.
#Due Date Automations

Use the Due Date trigger to automatically take action based on task due dates. This is useful for:
- Sending reminder notifications before tasks are due.
- Sending email notifications when tasks are past due.
- Escalating overdue tasks by changing their priority.
- Reassigning tasks that have been overdue for too long.
- Changing status of tasks to flag them for attention.
#Configure Due Date Condition
When Trigger = Due Date, you will see a CONDITION block with:
- When - select the condition type:
- Past Due - triggers after the due date has passed.
- Before Due - triggers before the due date arrives.
- Days - specify the number of days (1-30) for the condition.
Examples:
-
Before Due - by 2 daysTriggers 2 days before the task is due - useful for sending reminders. -
Past Due - by 1 dayTriggers 1 day after the due date has passed - useful for escalation.
#Due Date Actions
Due Date automations support two types of actions:
1. Send Notification
Enable Send Notification to send email alerts based on due date conditions.
- Send email notification to - choose who receives the notification (you can select multiple):
- Board Owner - the board owner receives the email.
- Task Owner - the user who created the task receives the email.
- Assignee - the user assigned to the task receives the email.
2. Update Task
Under UPDATE TASK, click + Add Property to modify the task.
Available actions include:
- Priority - escalate by setting priority to High or Urgent.
- Status - move overdue tasks to a specific column (for example, "Blocked" or "Needs Attention").
- Assigned - reassign the task to a manager or different team member.
- Tags - add tags like "Overdue" or "Escalated".
Typical use cases:
- When a task is 2 days before due, send a reminder notification to the Assignee.
- When a task is 1 day past due, send an email notification to the Board Owner.
- When a task is 3 days past due, set priority to High and notify the assigned user.
- When a task is 7 days past due, reassign to a manager and add an "Escalated" tag.
#Schedule Automations (Recurring Tasks)
Use the Schedule trigger when you want t0ggles to create tasks on a recurring basis.
#Configure The Schedule
When Trigger = Schedule, you will see:
- Project scope at the top - choose which project the recurring tasks should be created in.
- A CONDITION block with:
- Frequency: Every Month, Every Week, Every Day.
- Day selector (for example, "on 1st").
- Time selector (for example, "at 11:00 AM").
Example:
Every Month - on 1st - at 11:00 AM
This will run the automation once per month at the specified time.
#Create The Recurring Task
Below the schedule, you can configure the task that will be created:
-
CREATE TASK
- Title (for example, "Monthly Report" or "Monthly Client Report").
- Initial Status (for example, "To-Do").
-
TASK PROPERTIES (via + Add Property):
- Tags (for example, "Reporting").
- Start Date (relative, for example 0 days after).
- Due Date (relative, for example 3 days after).
- Assigned user and other task fields, if needed.
- Priority (for example, "High").
- Custom Properties (Board Properties) - set or adjust custom properties on the task.
Typical use case:
- Automatically create a Monthly Client Report task in a specific project on the 1st of every month, with:
- Tag "Reporting",
- Start date set to the day it’s created,
- Due date 3 days later.
#Enable, Duplicate, And Delete Automations
Each automation card has a control area in the top-right corner:
- Toggle switch - turns the automation on or off without deleting it.
- Duplicate icon - creates a copy of the automation, useful when setting up similar rules for different projects.
- Delete icon - removes the automation from the board.
You can keep multiple automations active on the same board. When several rules match the same task, they will all run in the order defined internally by the system.
Board Automations give you a way to automate common workflows on each board without writing code. You can start with simple rules like auto-assigning bugs, sending overdue task notifications, or creating monthly reports and later combine conditions and actions to support more advanced workflows as your projects grow.