- Dashboard
- Workspace
- Projects
- Board Settings
- Project Settings
- Tasks
- Create Task
- Edit Task
- Change Status
- Order Tasks
- Subtasks
- Task Dependencies
- Milestones
- Pin To Top
- Task Templates
- Duplicate Task
- Move To Board
- Create Note From Task
- Archive Task
- Unarchive Task
- Delete Task
- Task Updates History
- Reminders
- Time Tracking
- AI Tasks
- Export Task
- Share Task
- Import Multiple Tasks
- Export Multiple Tasks
- Notes
- Forms
- Comments
- Text Editor
- Account
- MCP Server
- t0ggles Crew
Create Form
#Overview of Forms
Forms are custom intake forms attached to your board. External people or team members fill them in, and every submission becomes a task - routed to the right project, tags, and priority via field mapping - with an optional approval queue in between. Typical uses: bug reports, feature requests, client requests, job applications, support intake.
Board admins create and manage forms. Board members (editors) with access to all projects also see the Forms page - they can review submissions, approve or decline them, and message submitters, but not edit the forms themselves. Members restricted to specific projects and guests don't see the page at all - they can still submit through the form link like anyone else.
Free plan: includes 1 form per board and 50 submissions per month. Paid plans are unlimited.
#How to Create a Form
-
Open the Forms Page
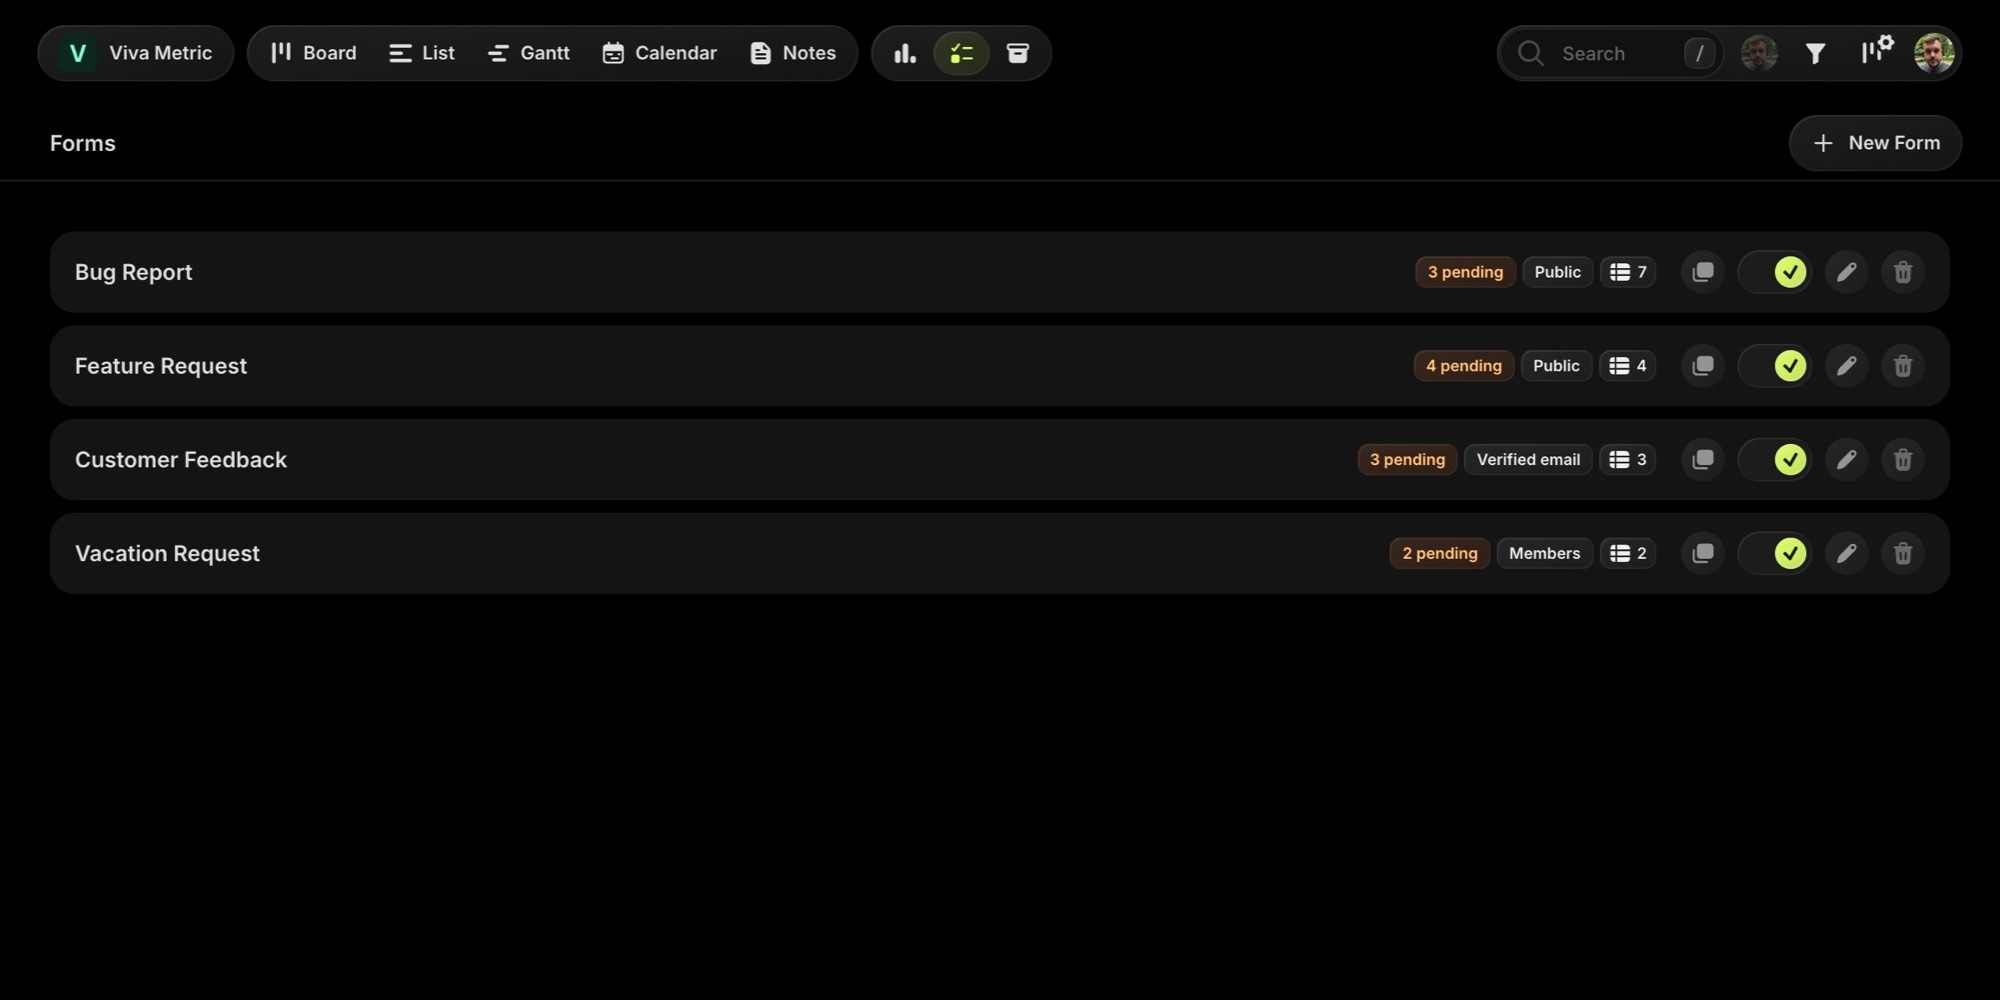
In the board navbar, click the Forms button. You will see the list of all forms on the board with their access mode, submissions count, and pending submissions badge.
-
Click "New Form"
A new form is created and the form builder opens. A form needs at least one project on the board - submissions become tasks, and tasks live in projects.
-
Set Up the Basics
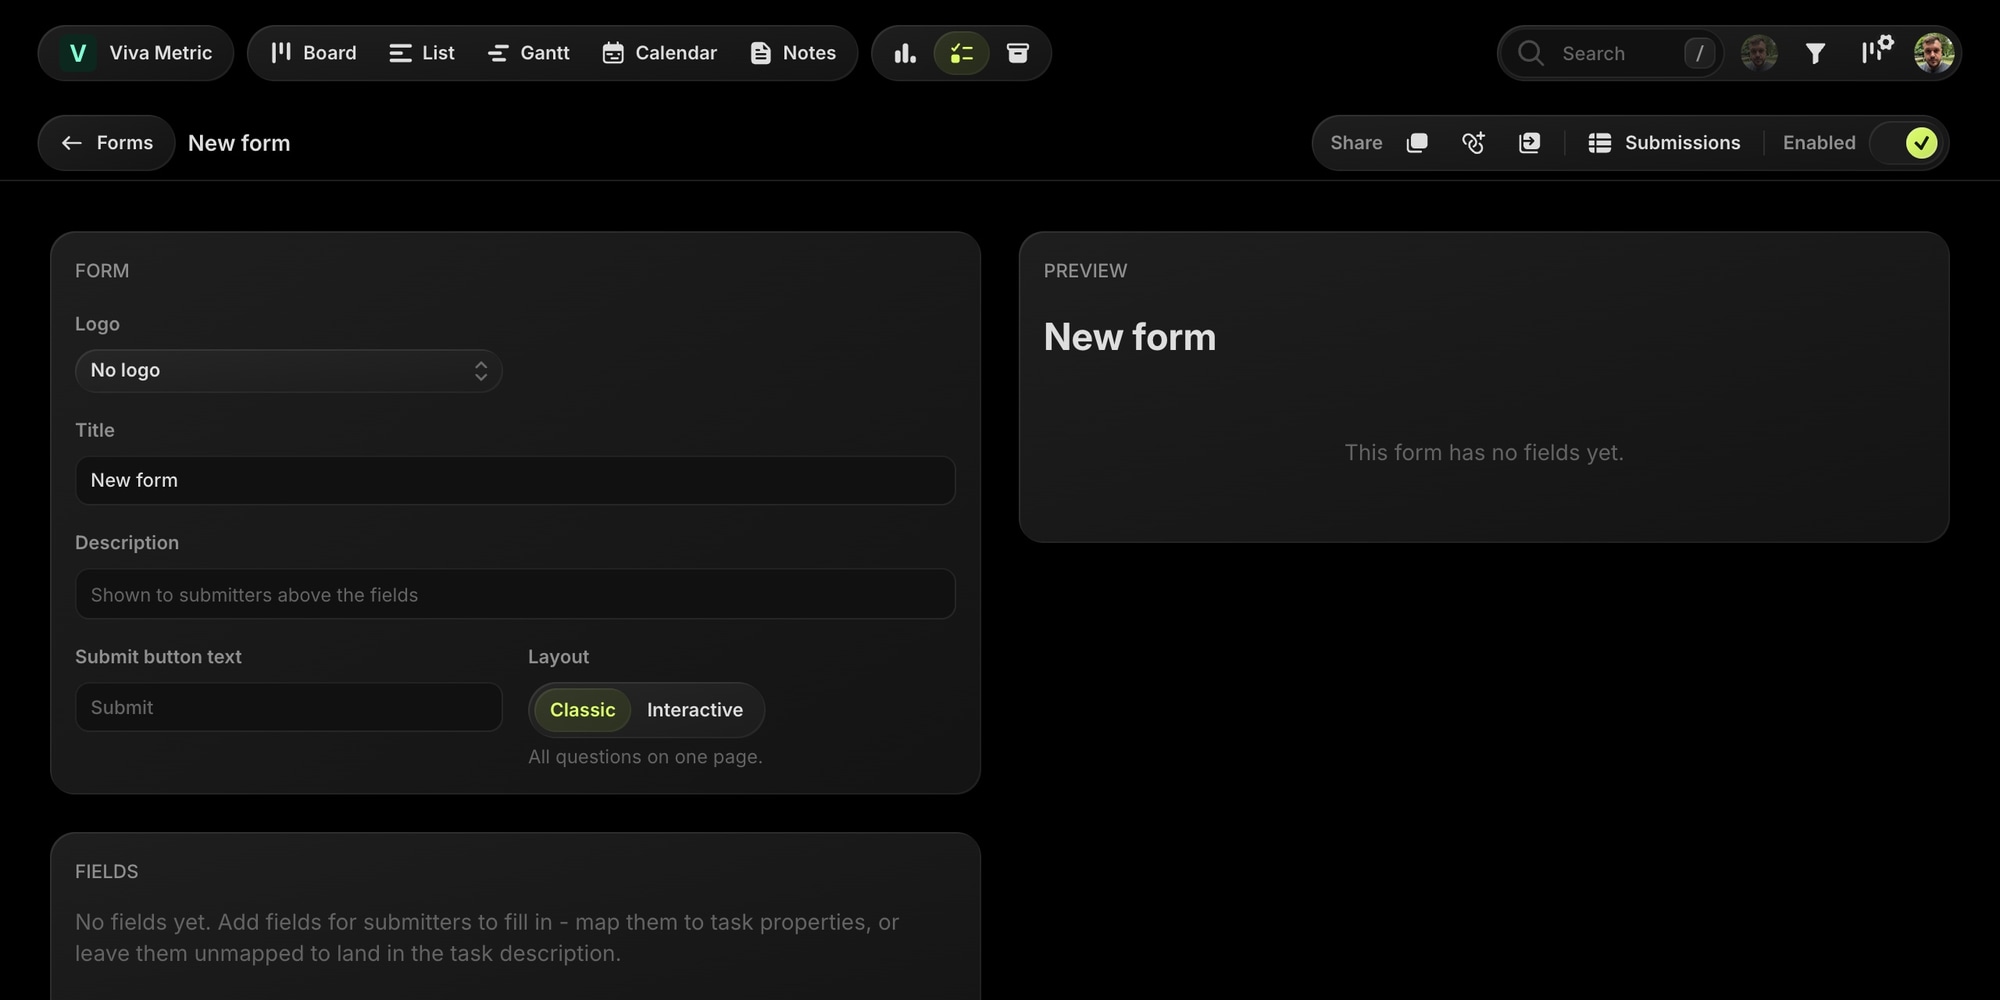
In the Form section you can configure:
- Logo - shown above the form title on the public page: your board logo, a project logo, or a custom uploaded image. The logo also appears in the emails submitters receive and as the public page's favicon.
- Brand color - accent color of the public form. By default the form uses your board's brand color; set a custom one to match, for example, the project the form is dedicated to. The live preview shows it right away.
- Title and Description - what the submitter sees at the top of the form.
- Submit button text - custom label for the submit button (default "Submit").
- Layout - Classic (all questions on one page) or Interactive (one question per screen, Typeform-style). See Interactive Layout below.
-
Add Fields
Build your form in the Fields section - see Form Fields for all field types and Field Mapping for routing answers into task fields. The live preview on the right always shows the form exactly as submitters will see it.
-
Configure Settings
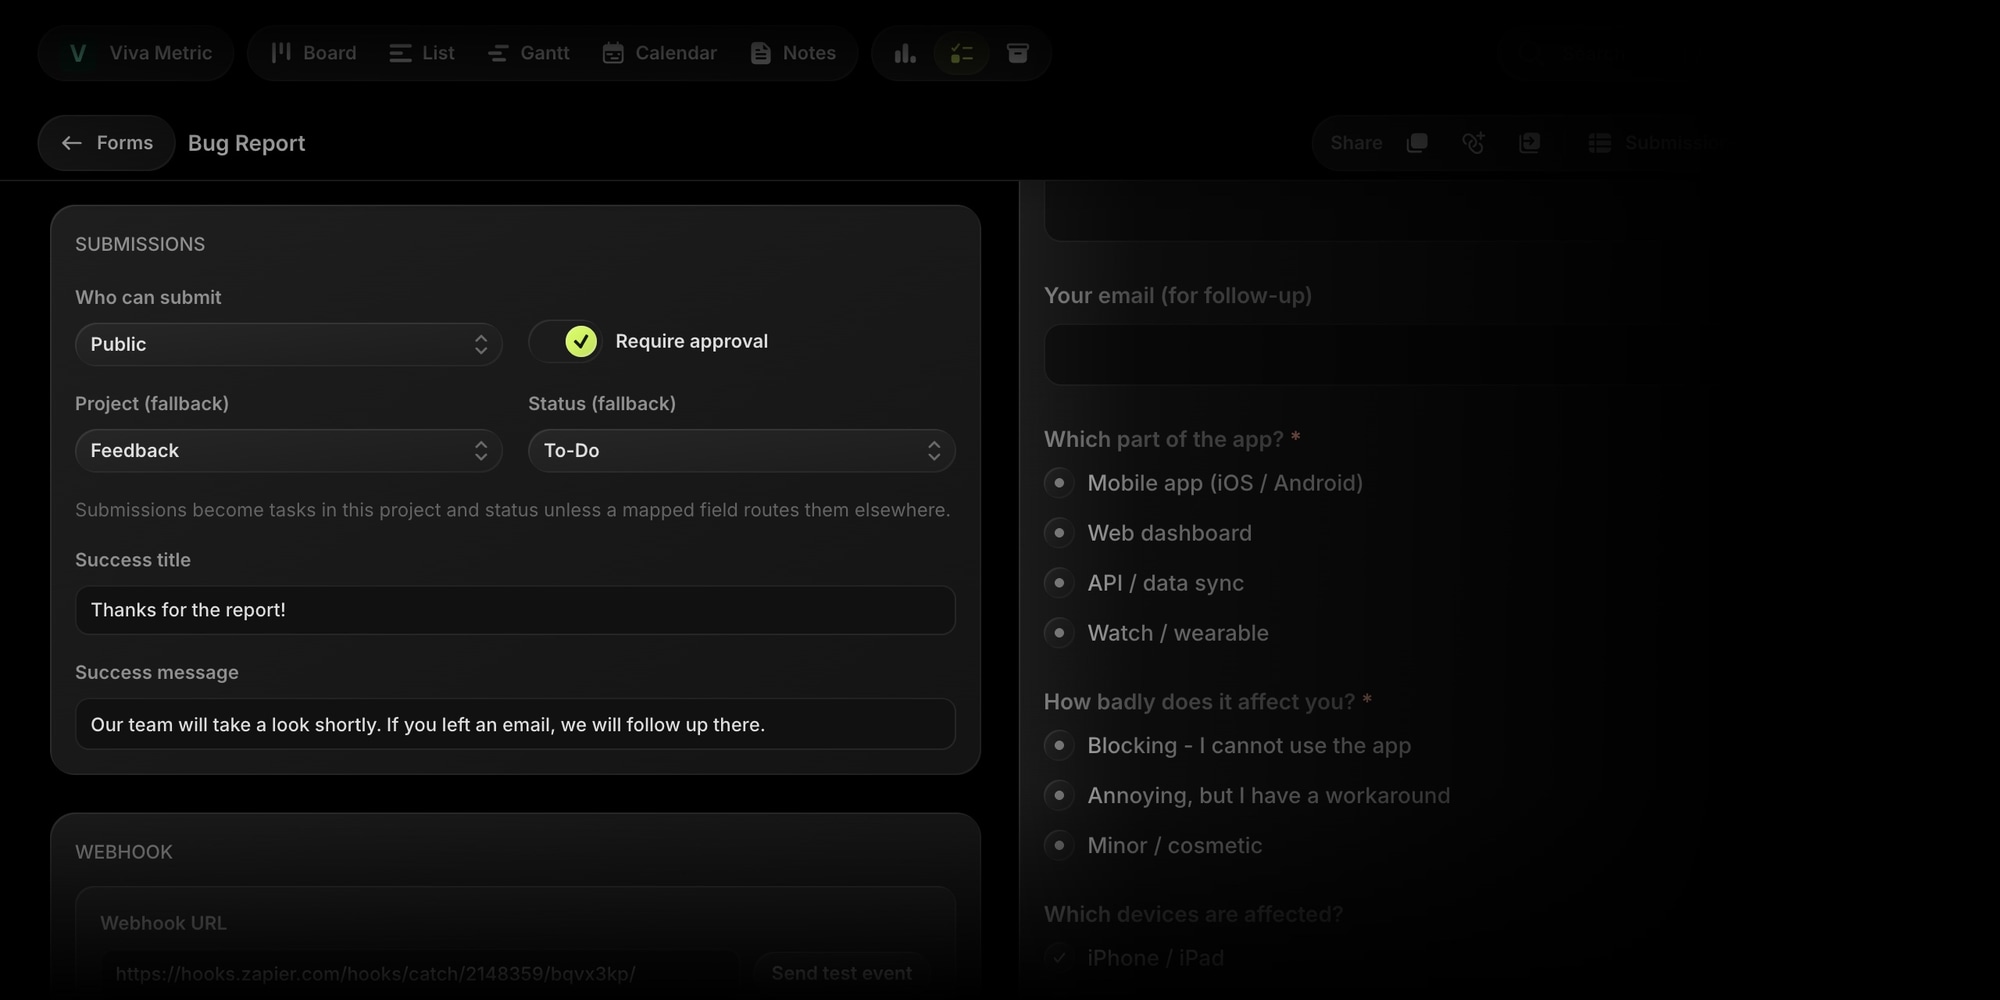
- Who can submit - Public, Verified email, or Members. See Access Modes.
- Require approval - when enabled, submissions wait in a pending queue and no task is created until you approve them.
- Project (fallback) and Status (fallback) - where submissions become tasks unless a mapped field routes them elsewhere.
- Success title and Success message - custom text for the screen shown after submitting.
-
Share It
Copy the form link and send it to anyone - see Share Form.
All changes are saved automatically as you edit.
#Interactive Layout
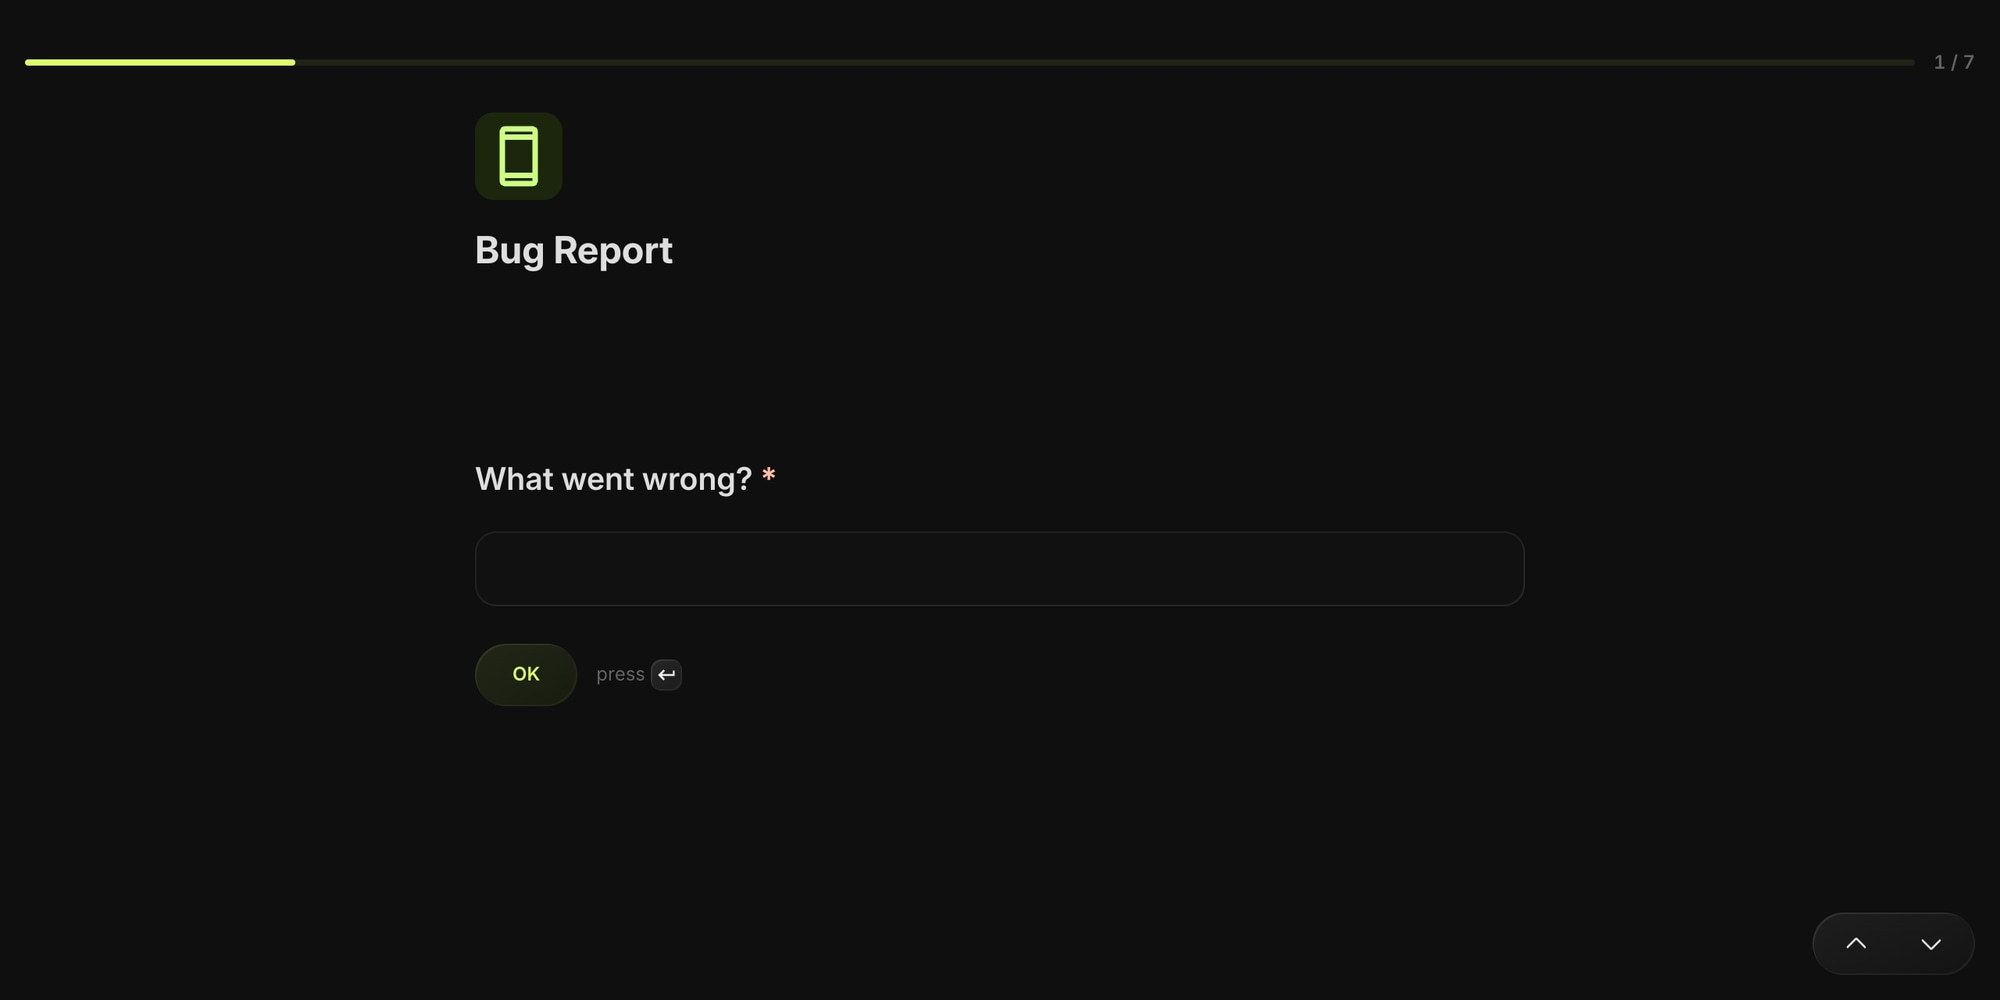
With the Interactive layout the public form shows one question per screen with a progress bar - a focused, conversational flow that works great on mobile:
- If the form has a description, submitters first see a welcome screen with your logo, title, and a Start button.
- Enter advances to the next question (Cmd/Ctrl+Enter inside long text fields).
- Single-choice questions auto-advance after a pick; chevrons in the corner let submitters go back and forth.
- The last question shows the real submit button.
Switch between Classic and Interactive at any time - it's purely presentational, and the live preview follows along.
#Enable, Disable, Duplicate, and Delete
Each form has an Enabled toggle - in the forms list and in the builder toolbar. A disabled form keeps its configuration and submissions, but its public page shows an "unavailable" screen.
Duplicate (in the forms list) copies a form's fields, mapping, branching, appearance, and settings into a new form and opens it in the builder. Submissions are not copied, and the copy gets its own share link, so nothing sent to the original ends up on the copy.
Forms also come along when you clone a board with "Include Forms" checked, again without submissions and with fresh share links.
Deleting a form permanently removes it along with its submissions and their uploaded files (tasks already created stay on the board).